Advanced
The Advanced tab of the API Configuration page lets you adjust the time for request timeouts, fault message details and response cache for REST, SOAP and GraphQL APIs.
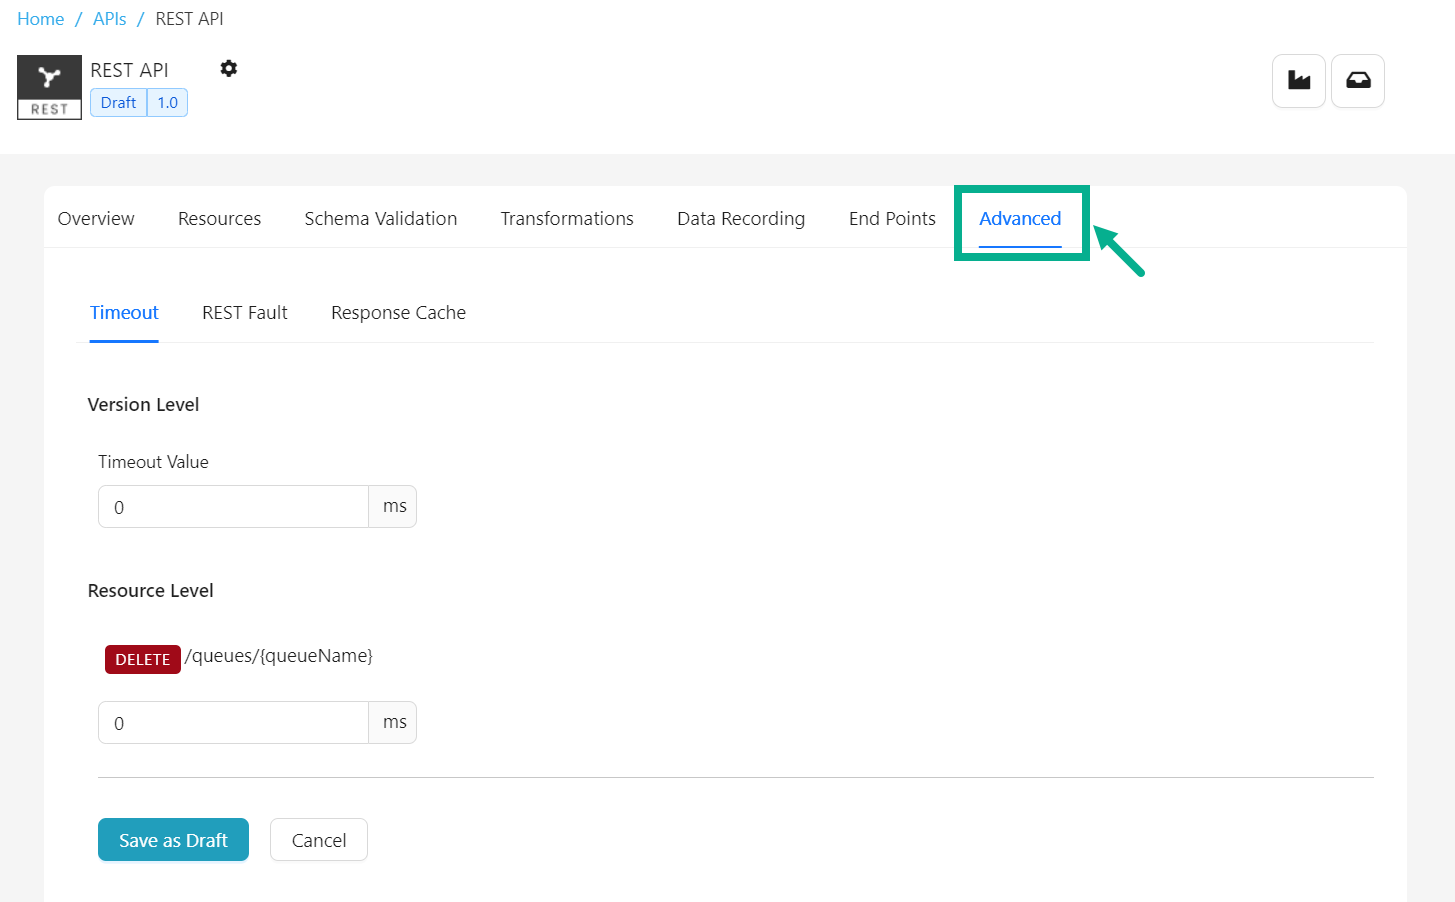
Set the request timeout for a REST API
- Navigate to the REST API's Advanced tab.
The screen appears as shown below.
-
Ensure that Timeout tab is selected.
-
Enter the Timeout Value for the Version Level and Resource Level as per the requirement.
-
Click Save as Draft.
On saving, the confirmation message appears as shown below.

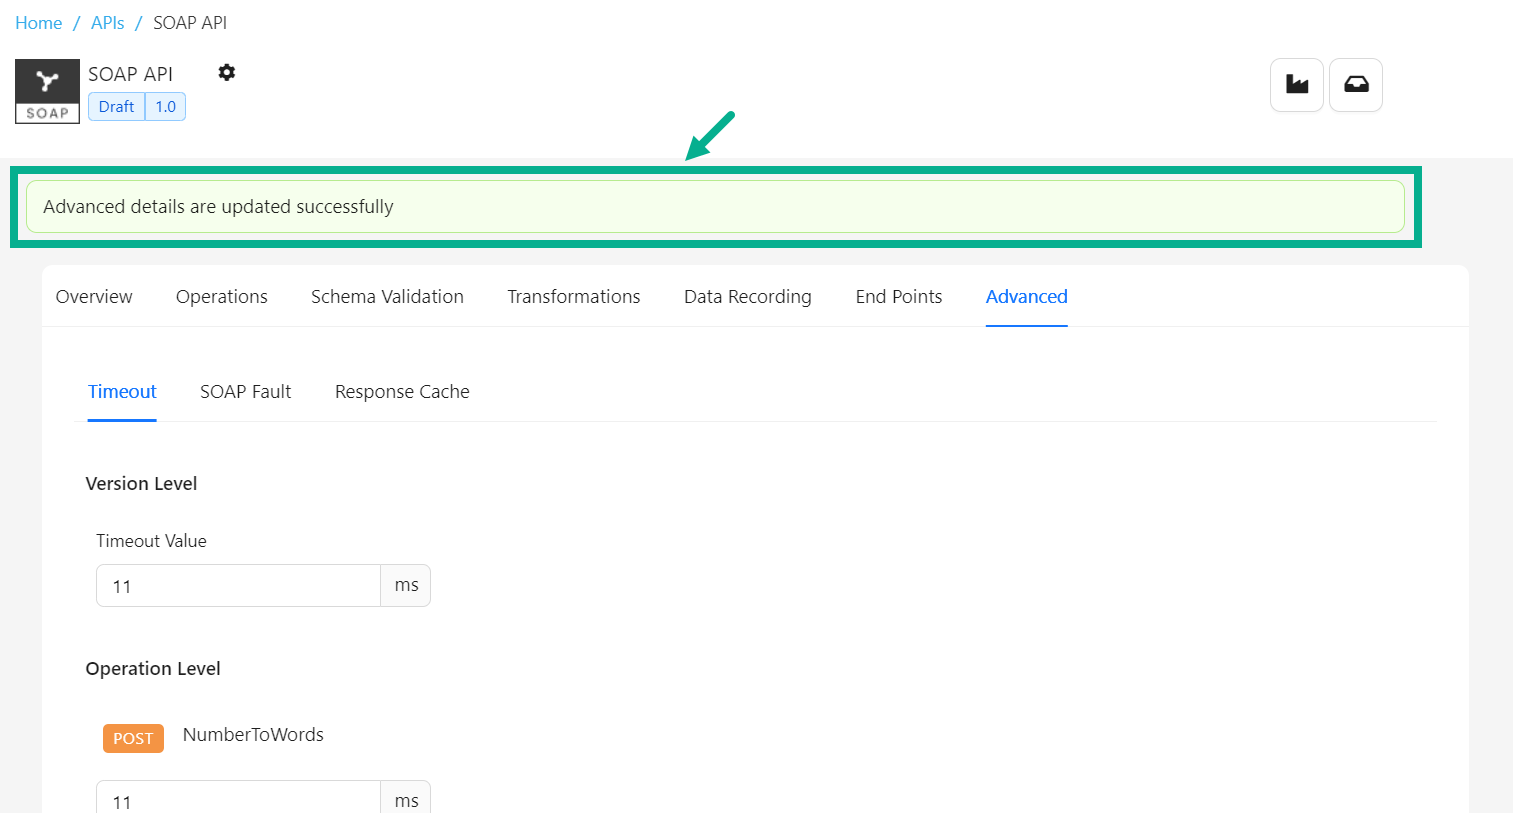
Set the request timeout for a SOAP API
- Navigate to the SOAP API's Advanced tab.
The screen appears as shown below.

-
Ensure that Timeout tab is selected.
-
Enter the Timeout Value for the Version Level and Operation Level as per the requirement.
-
Click Save as Draft.
On saving, the confirmation message appears as shown below.
Set the request timeout for a GraphQL API
- Navigate to the GraphQL API's Advanced tab.
The screen appears as shown below.

-
Ensure that Timeout tab is selected.
-
Enter the Timeout Value for the Version Level and Resource Level as per the requirement.
-
Click Save as Draft.
On saving, the confirmation message appears as shown below.

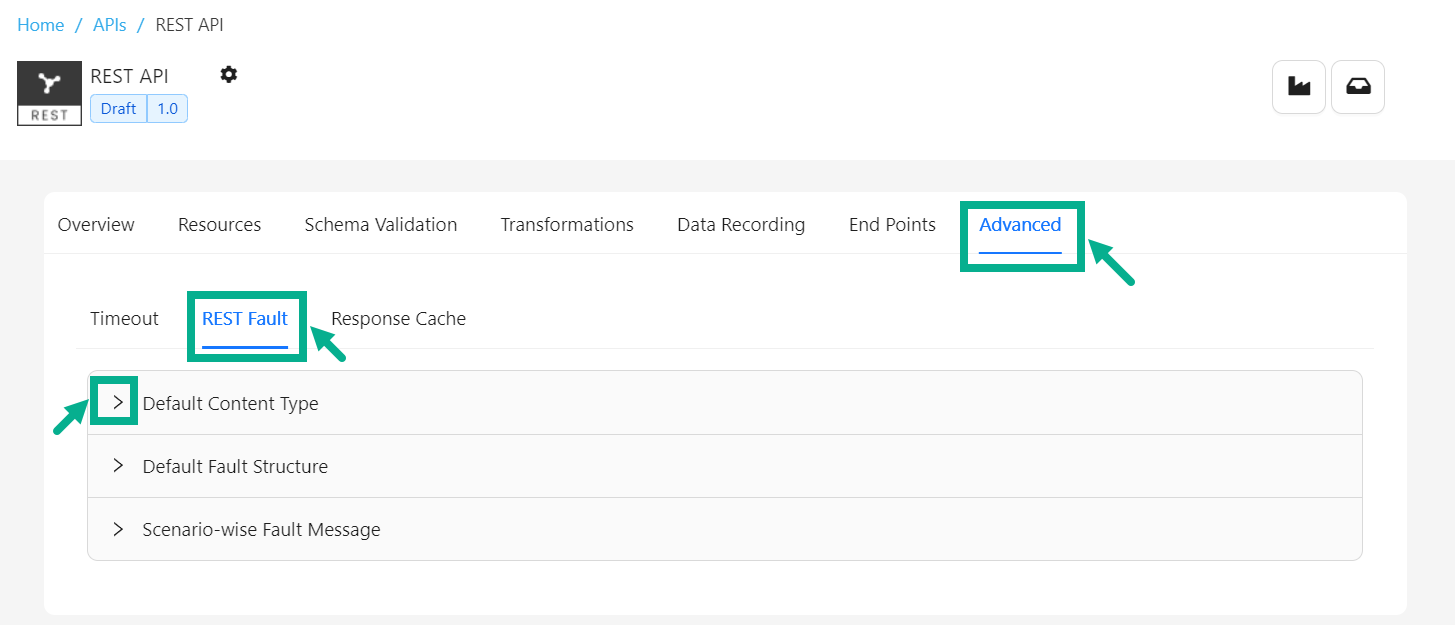
Set REST Fault setup for the REST API
- Navigate to the REST API's Advanced tab.
The screen appears as shown below.
-
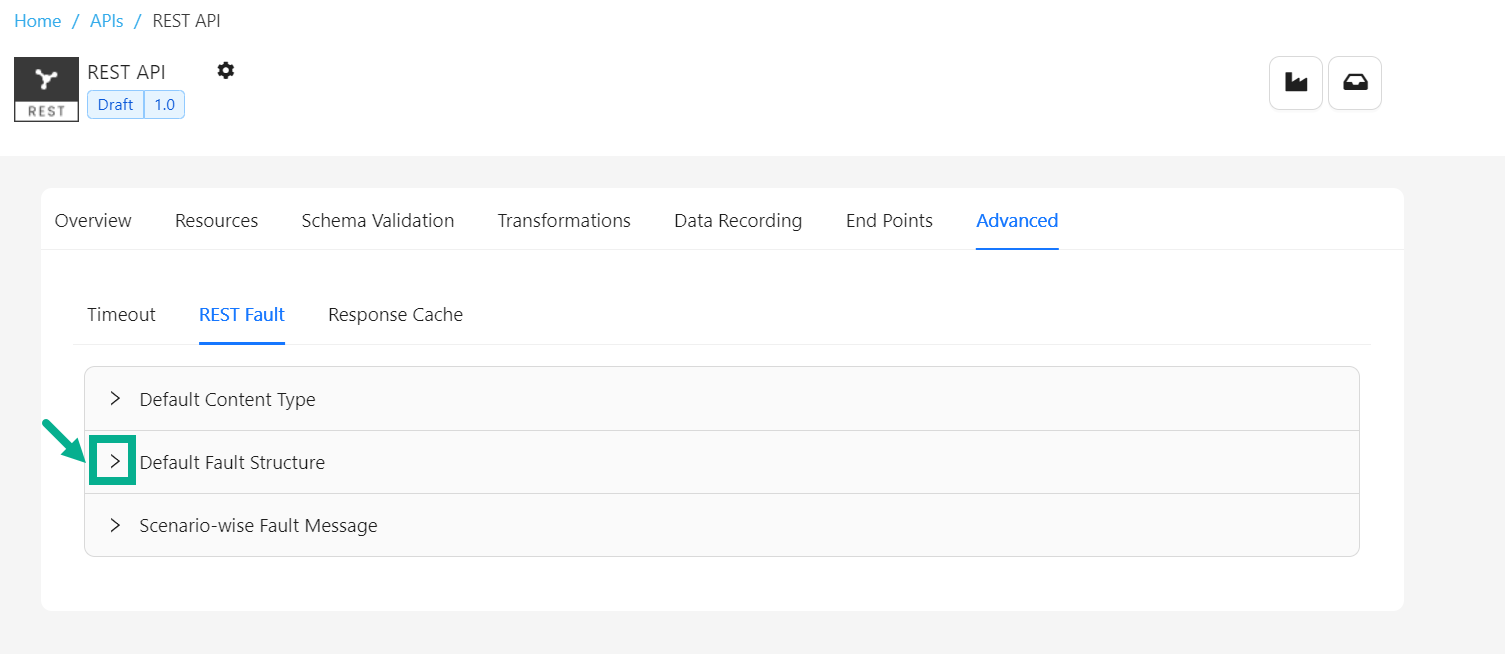
Select the REST Fault tab.
-
Click the Expand icon to expand the Default Content Type section.

-
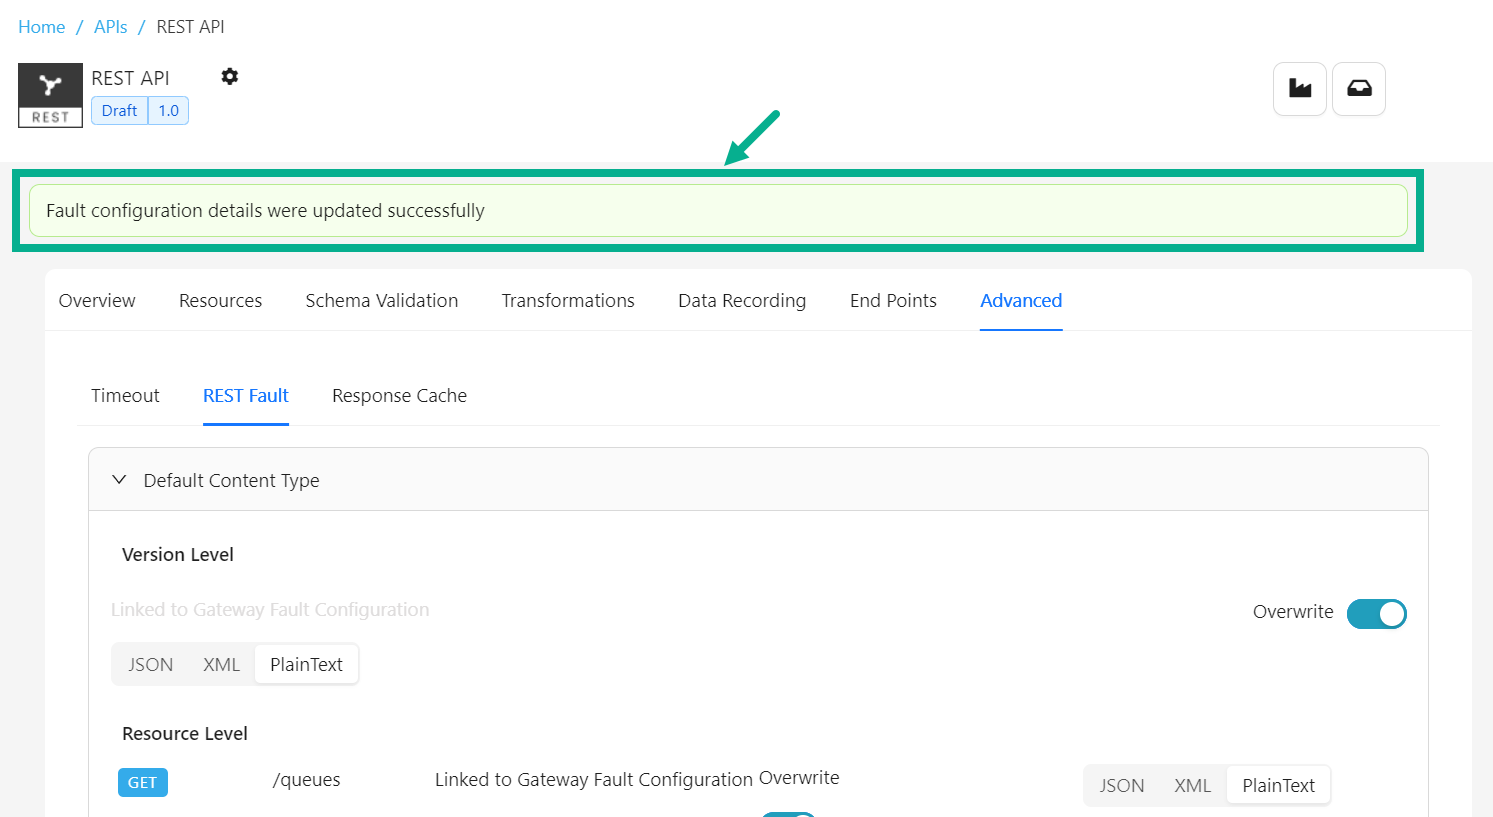
Enable the Overwrite toggle to overwrite at the API Version Level.
-
Select the JSON, XML, or Plain Text content type that is required to be configured at the API Version Level.

-
Enable the Overwrite toggle to overwrite at the respective Resource Level.
-
Select the JSON, XML, or Plain Text content type that is required to be configured at the Resource Level.
-
Click Save as Draft.
On saving, the confirmation message appears as shown below.
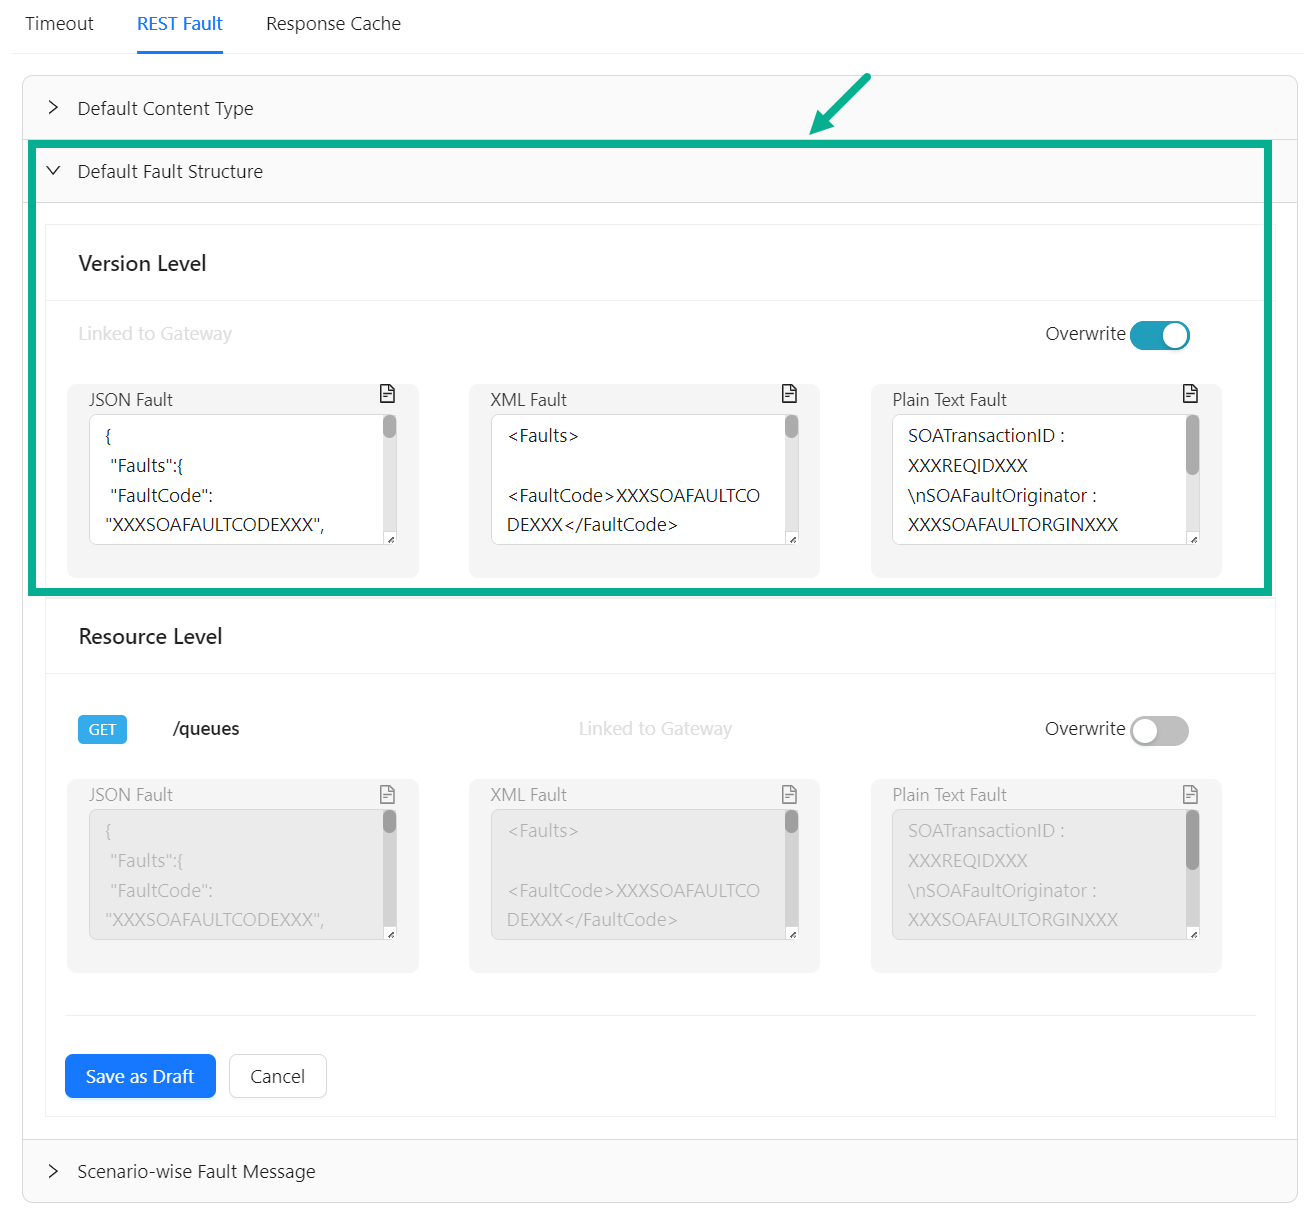
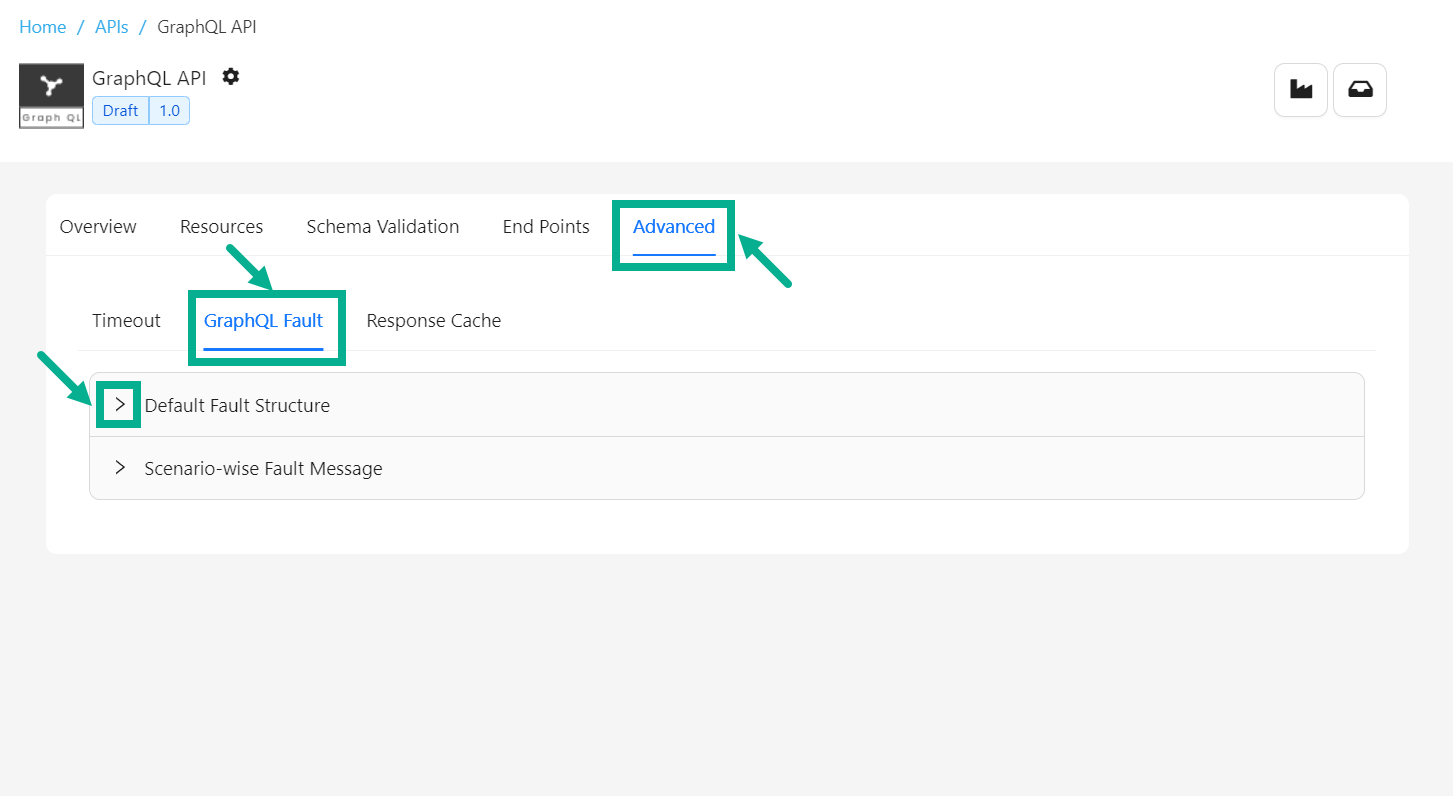
- Click the Expand icon to expand the Default Fault Structure section.
- Enable the Overwrite toggle to overwrite at the API Version Level.
-
Overwrite the JSON Fault, XML Fault and Plain Text Fault at the API Version Level as per the requirement.
-
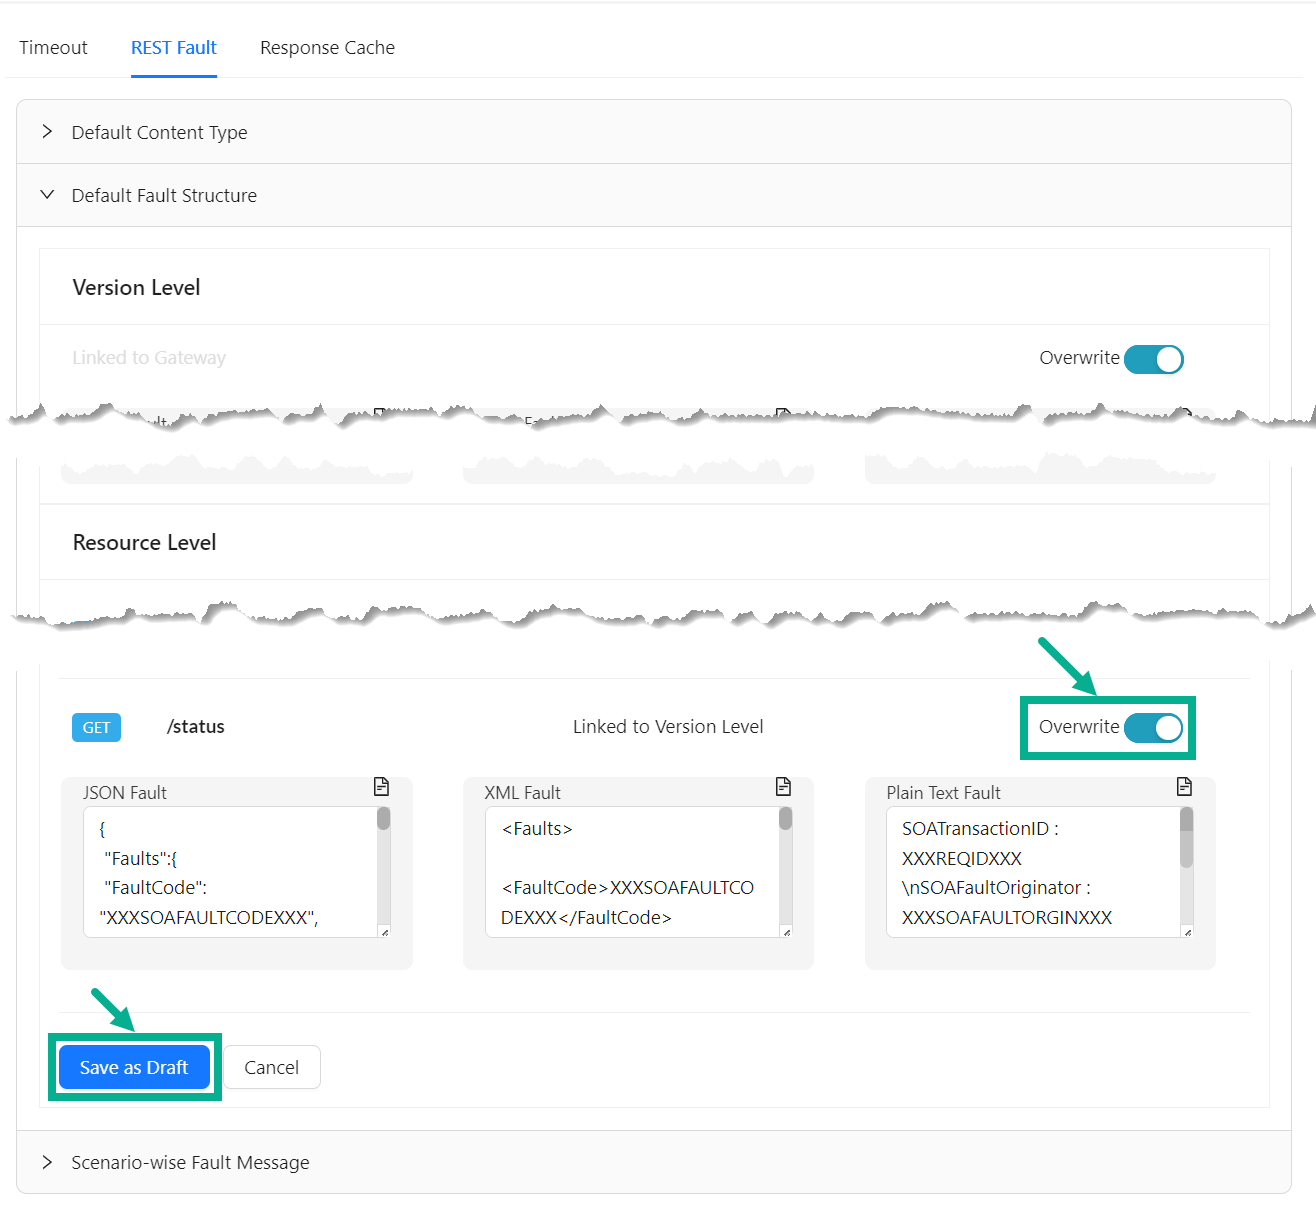
Ensure that the Overwrite toggle is enabled to overwrite at the respective Resource Level.
-
Overwrite the JSON Fault, XML Fault and Plain Text Fault at the respective Resource as per the requirement.
-
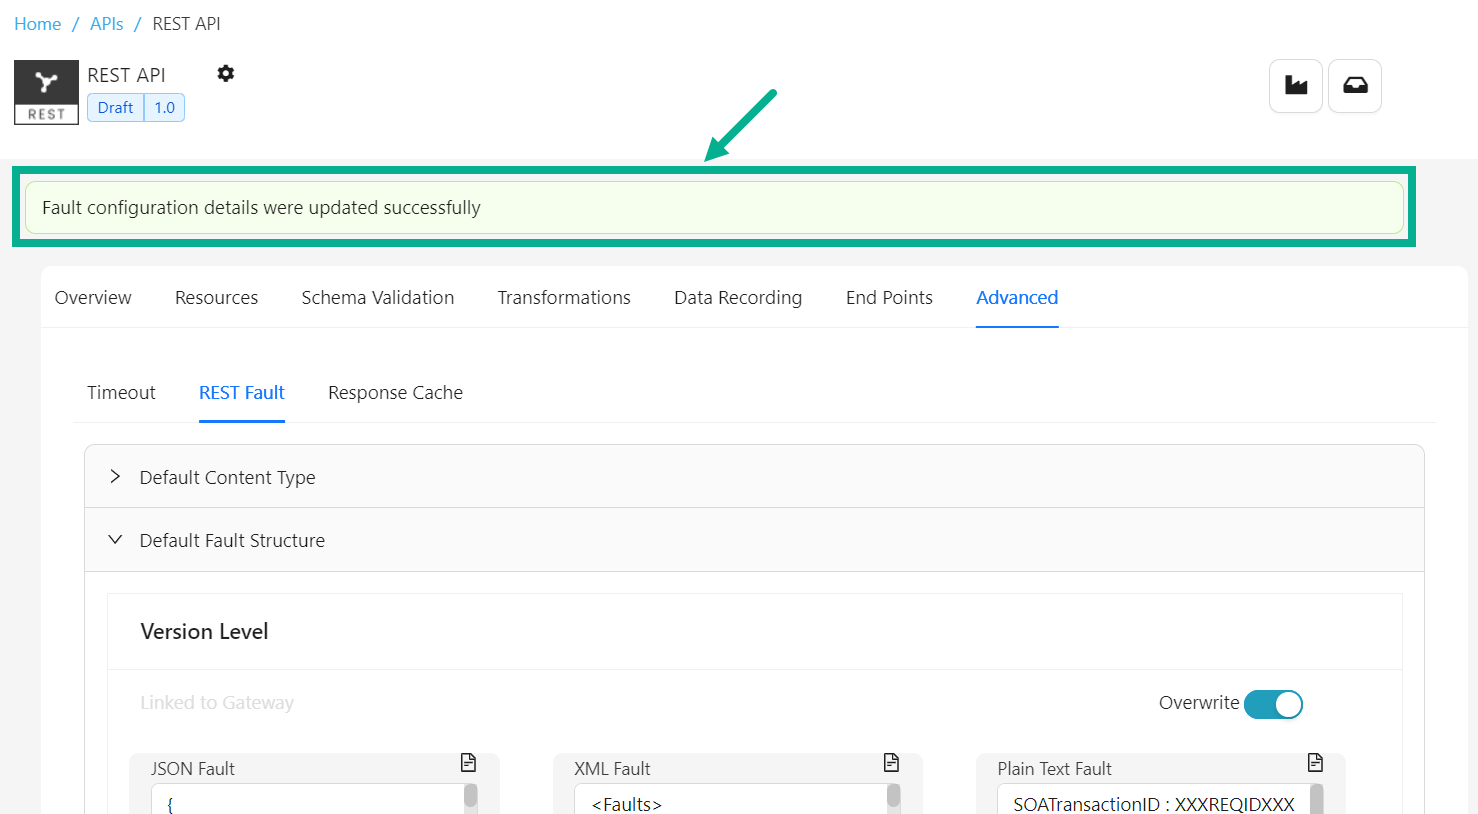
Click Save as Draft.
On saving, the confirmation message appears as shown below.
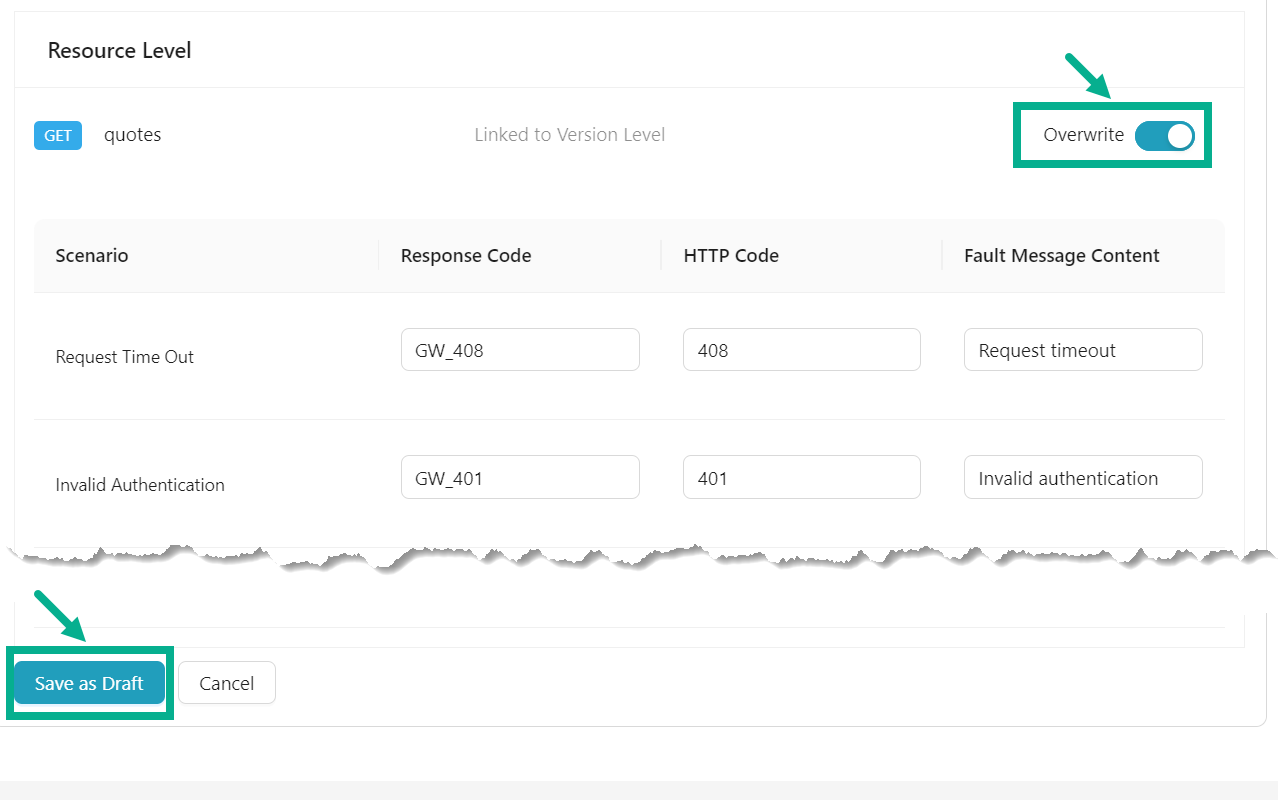
- Click the Expand icon to expand the Scenario-wise Fault Message section.
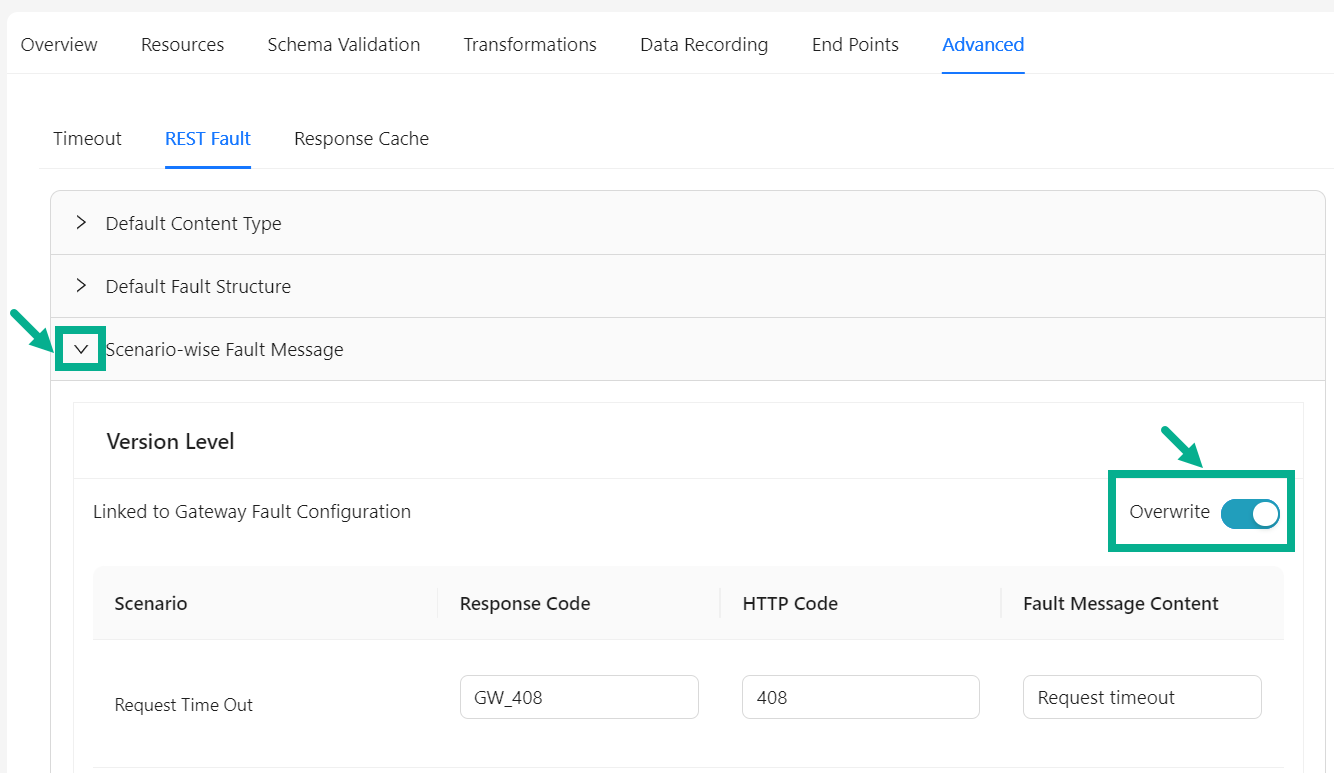
-
Enable the Overwrite toggle to overwrite at the API Version Level.
-
Overwrite the Response Code, HTTP Code and Fault Message Content at the at the API Version Level if necessary.
-
Enable the Overwrite toggle to overwrite at the respective Resource Level.
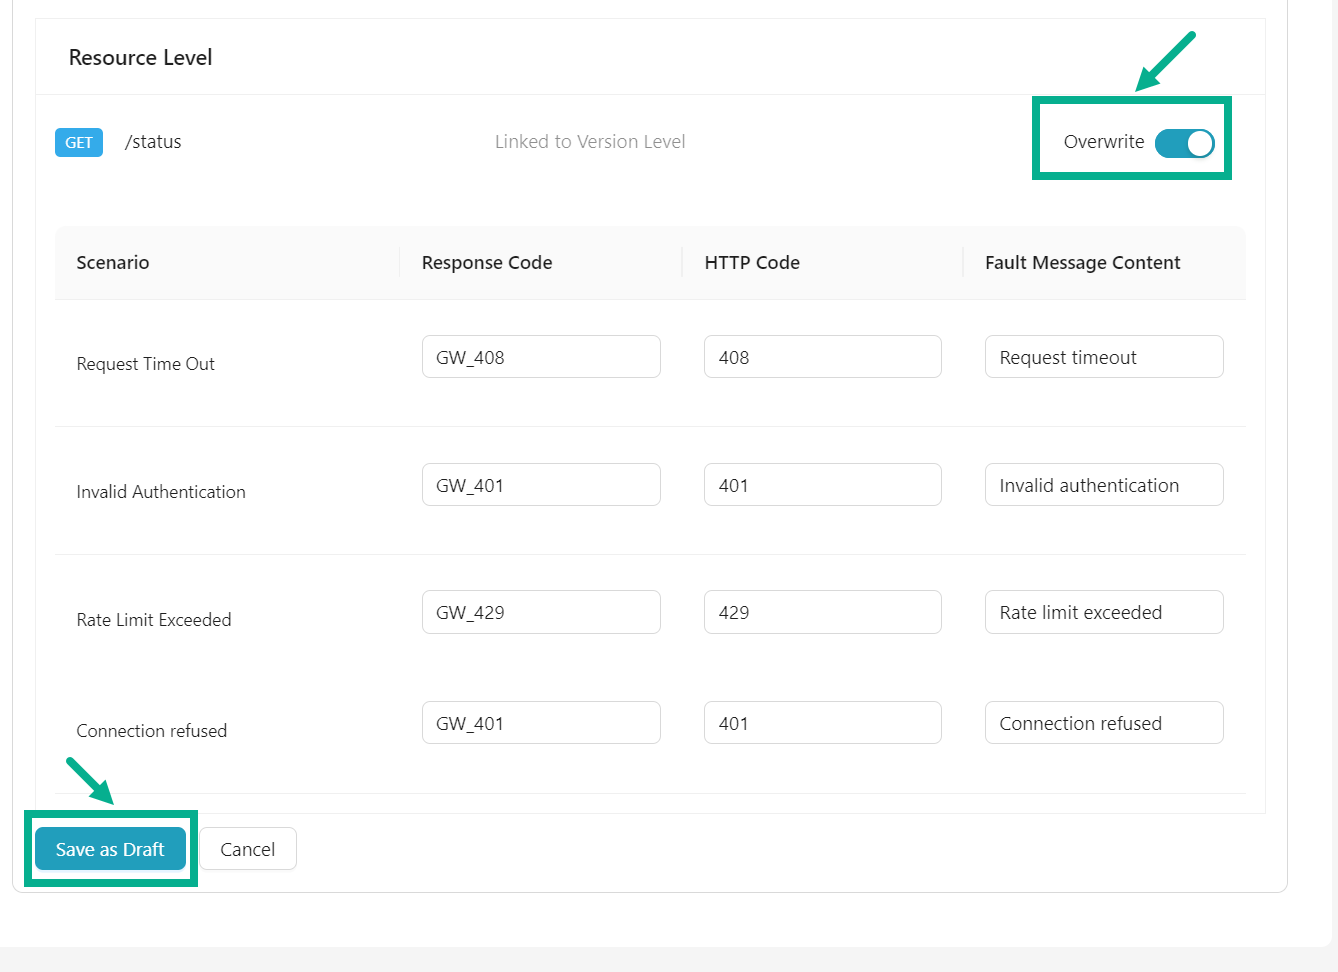
-
Overwrite the Response Code, HTTP Code and Fault Message Content at the at the respective Resource Level if necessary.
-
Click Save as Draft.
On saving, the confirmation message appears as shown below.

Set SOAP Fault setup for the SOAP API
- Navigate to the SOAP API's Advanced tab.
The screen appears as shown below.
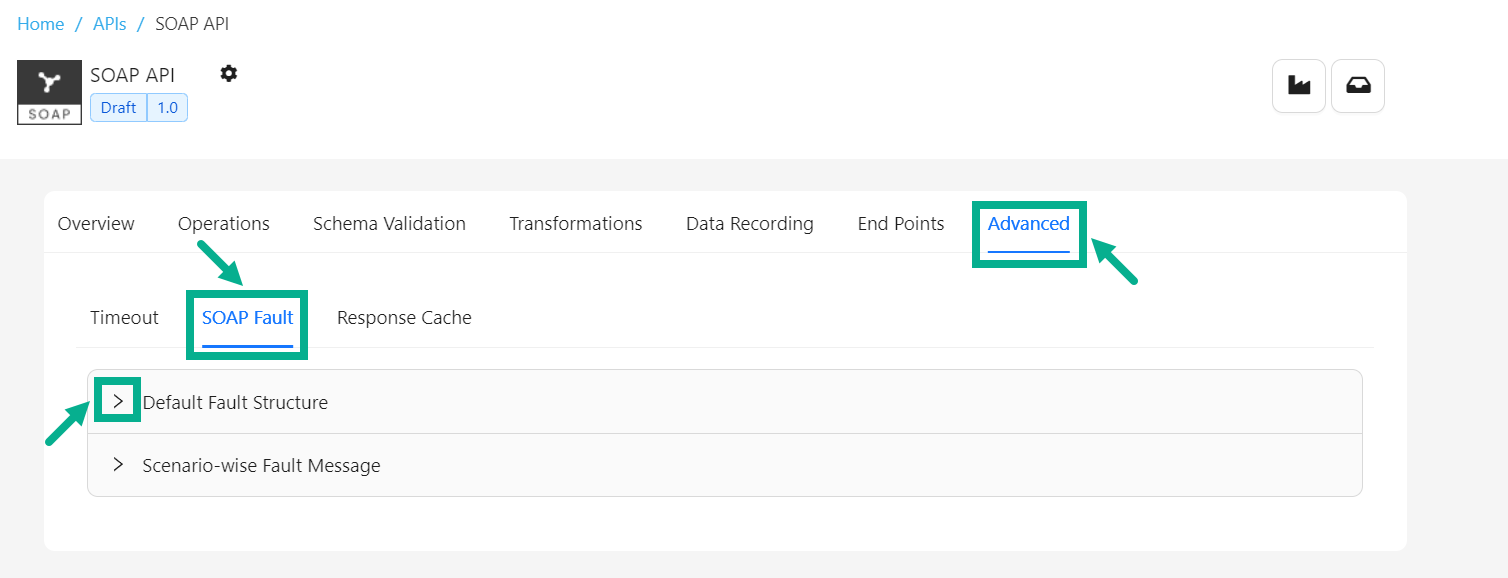
-
Select the SOAP Fault tab.
-
Click the Expand icon to expand the Default Content Type section.
-
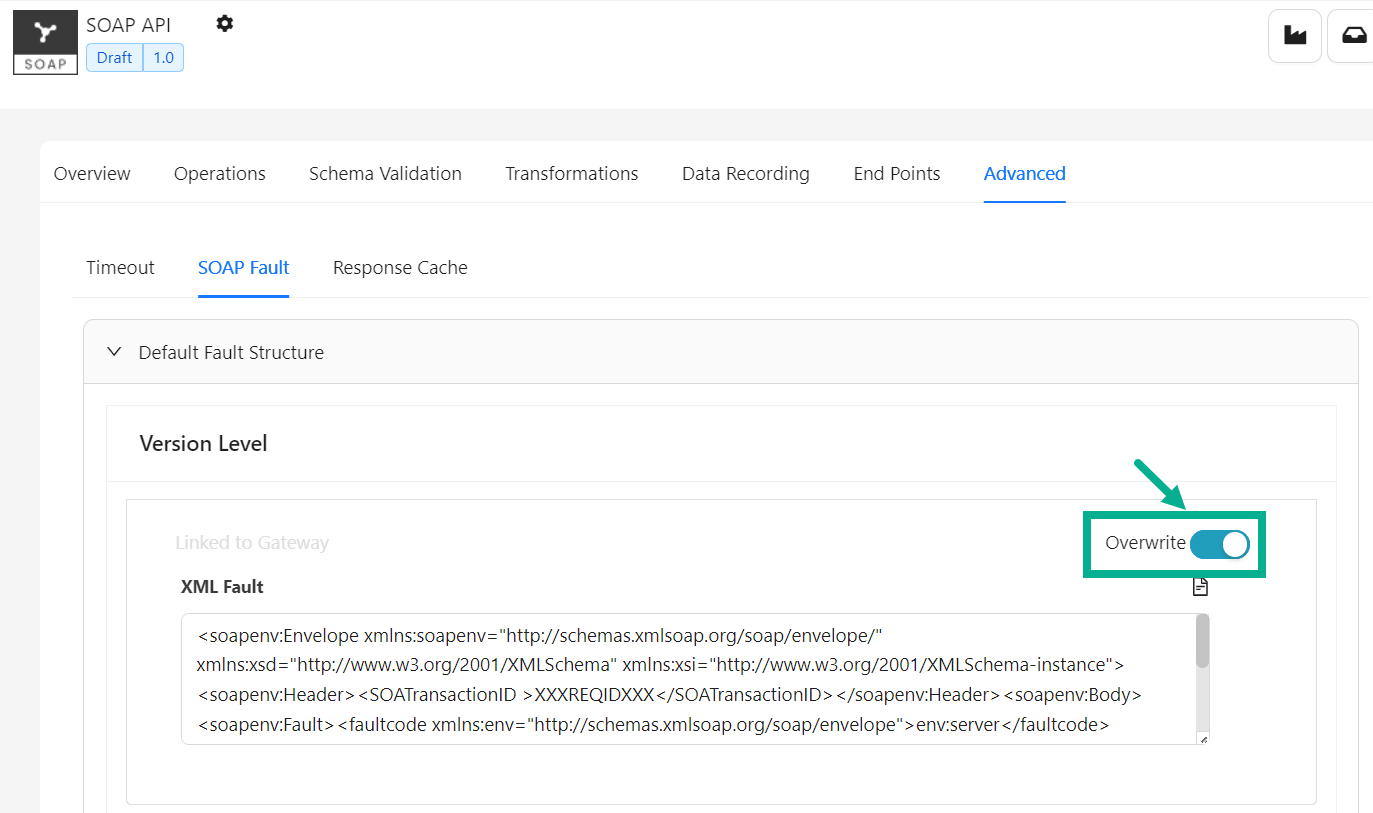
Enable the Overwrite toggle to overwrite at the API Version Level.
-
Overwrite the XML Fault at the API Version Level if necessary.
-
Enable the Overwrite toggle to overwrite at the respective Operation Level.
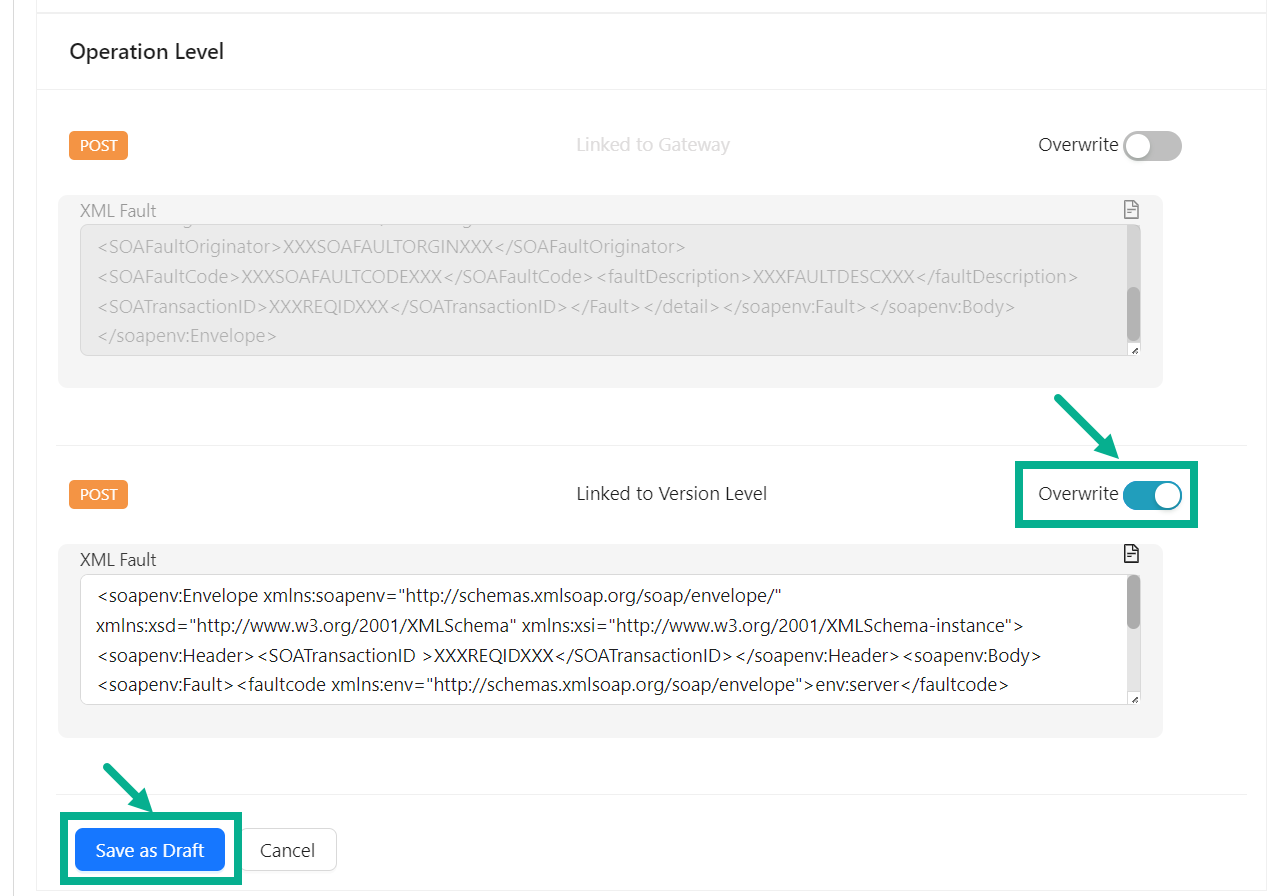
-
Overwrite the XML Fault at the respective Operation Level if necessary.
-
Click Save as Draft.
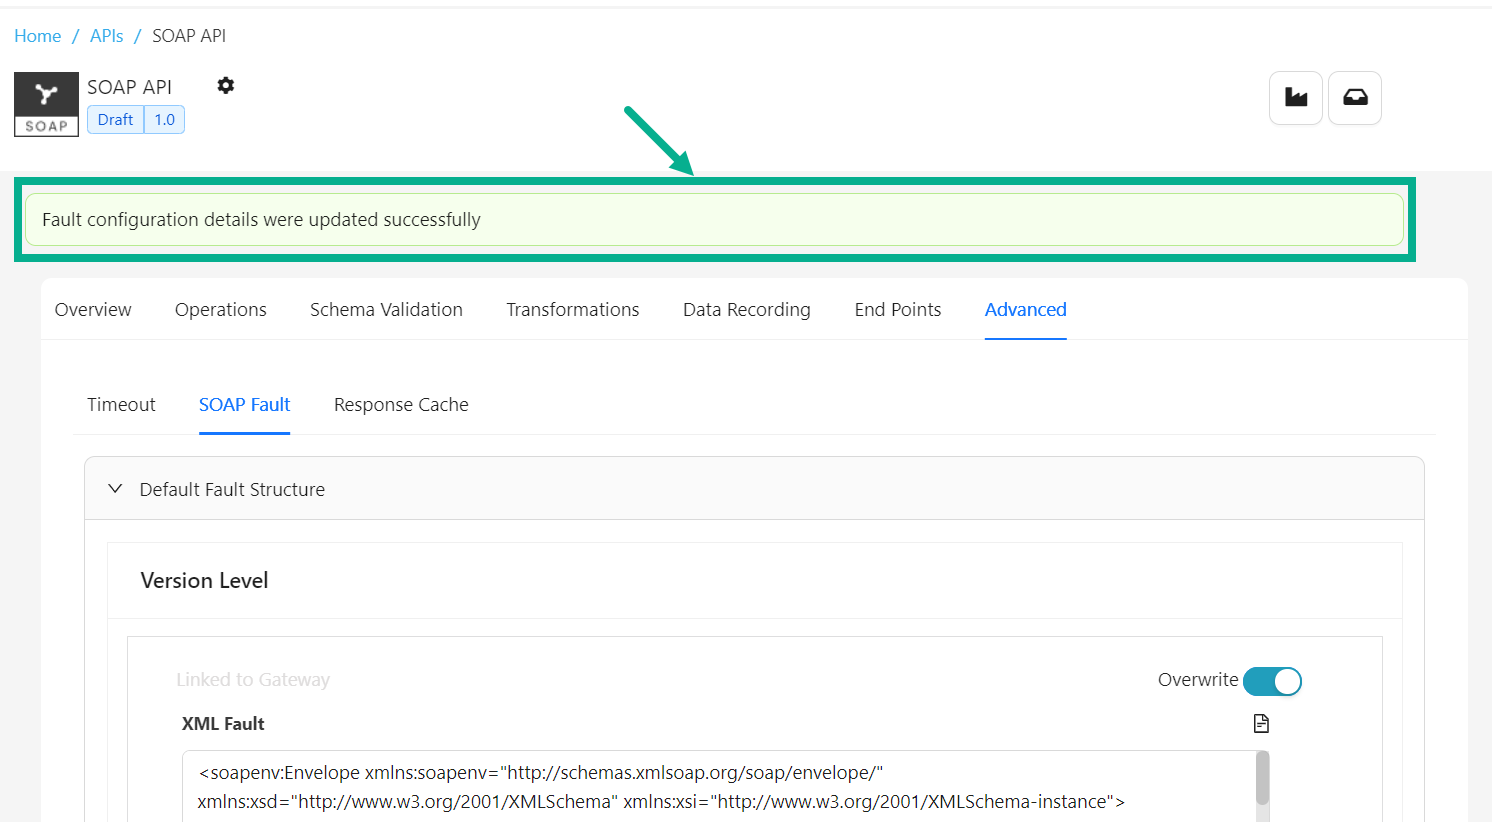
On saving, the confirmation message appears as shown below.
-
Click the Expand icon to expand the Scenario-wise Fault Message section.
-
Enable the Overwrite toggle to overwrite at the API Version Level.

-
Overwrite the Response Code, HTTP Code and Fault Message Content at the at the API Version Level if necessary.
-
Ensure that the Overwrite toggle is enabled to overwrite at the respective Resource Level.
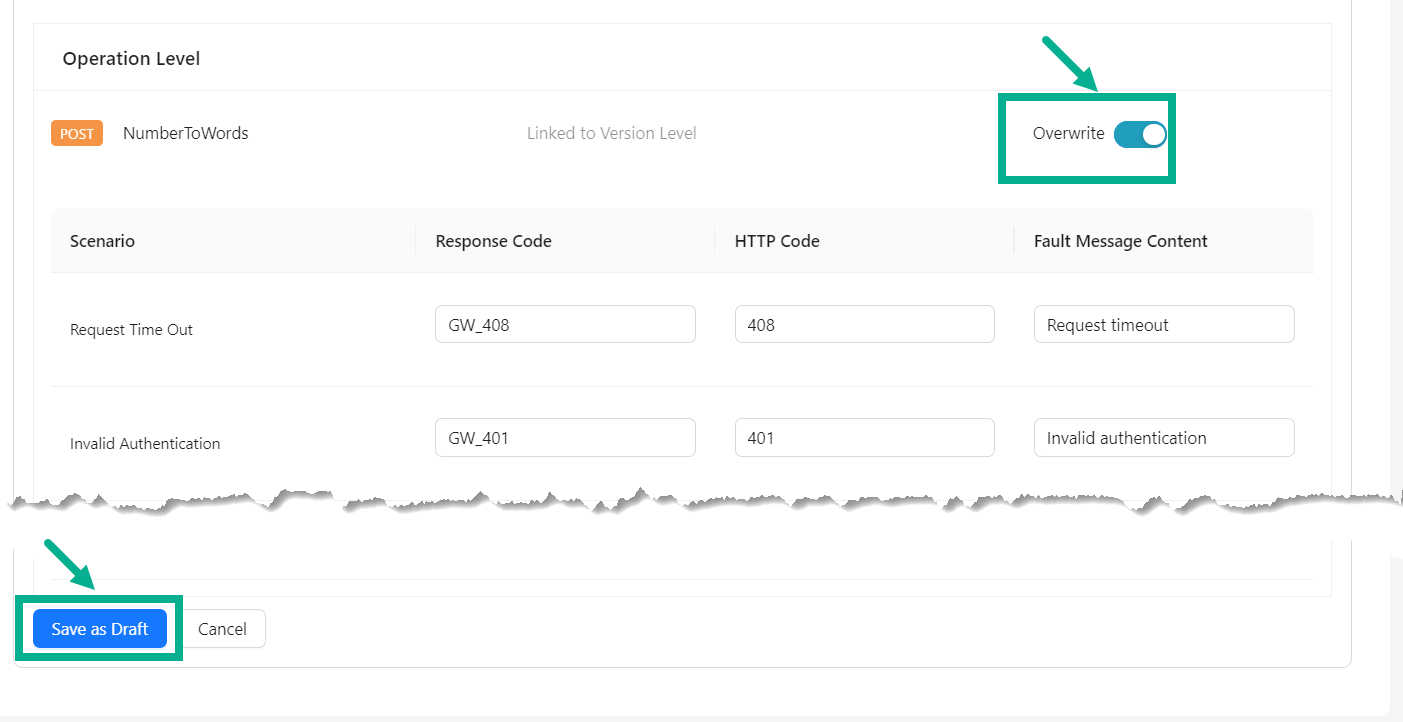
-
Overwrite the Response Code, HTTP Code and Fault Message Content at the at the respective Operation Level if necessary.
-
Click Save as Draft.
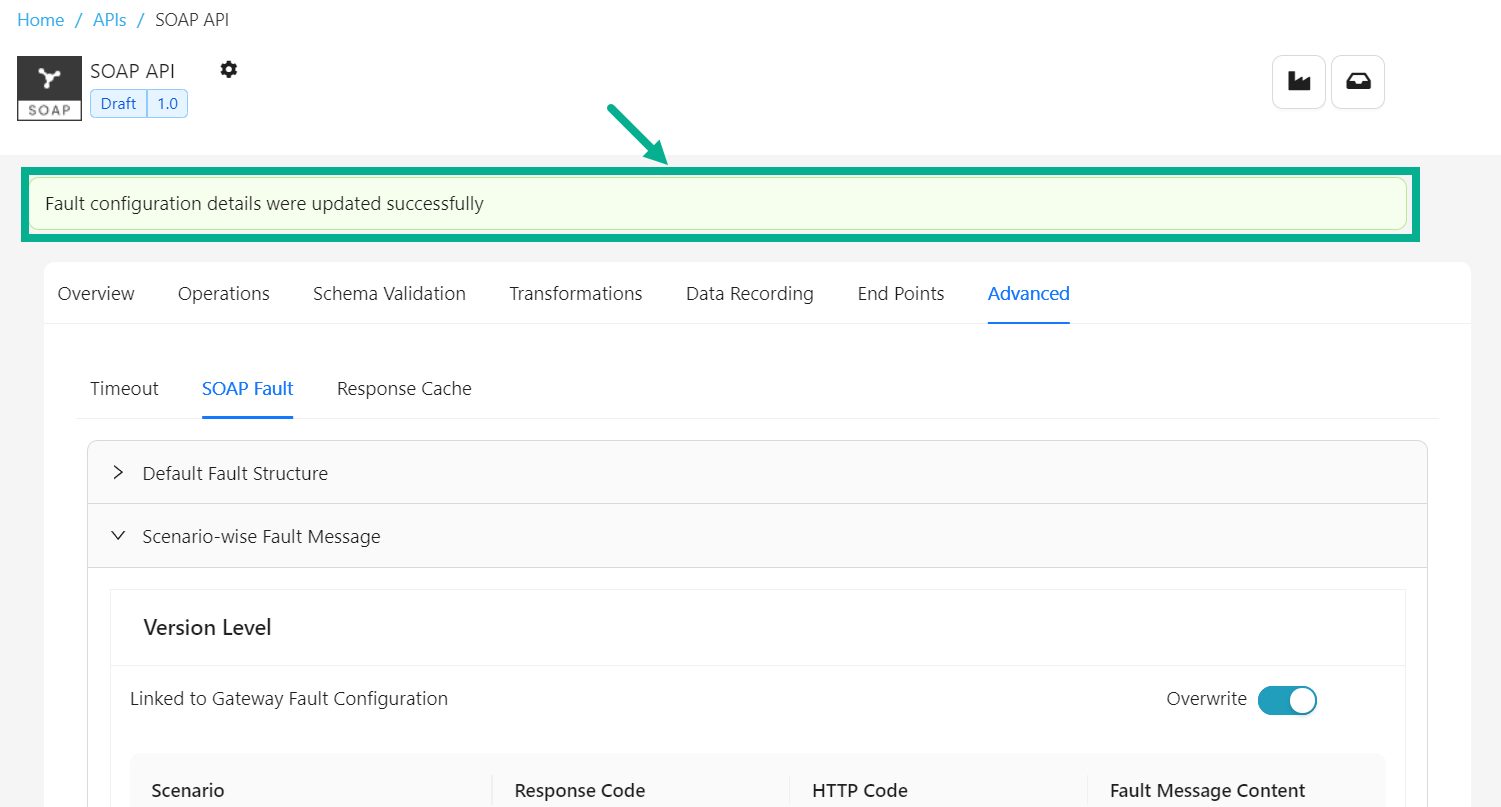
On saving, the confirmation message appears as shown below.
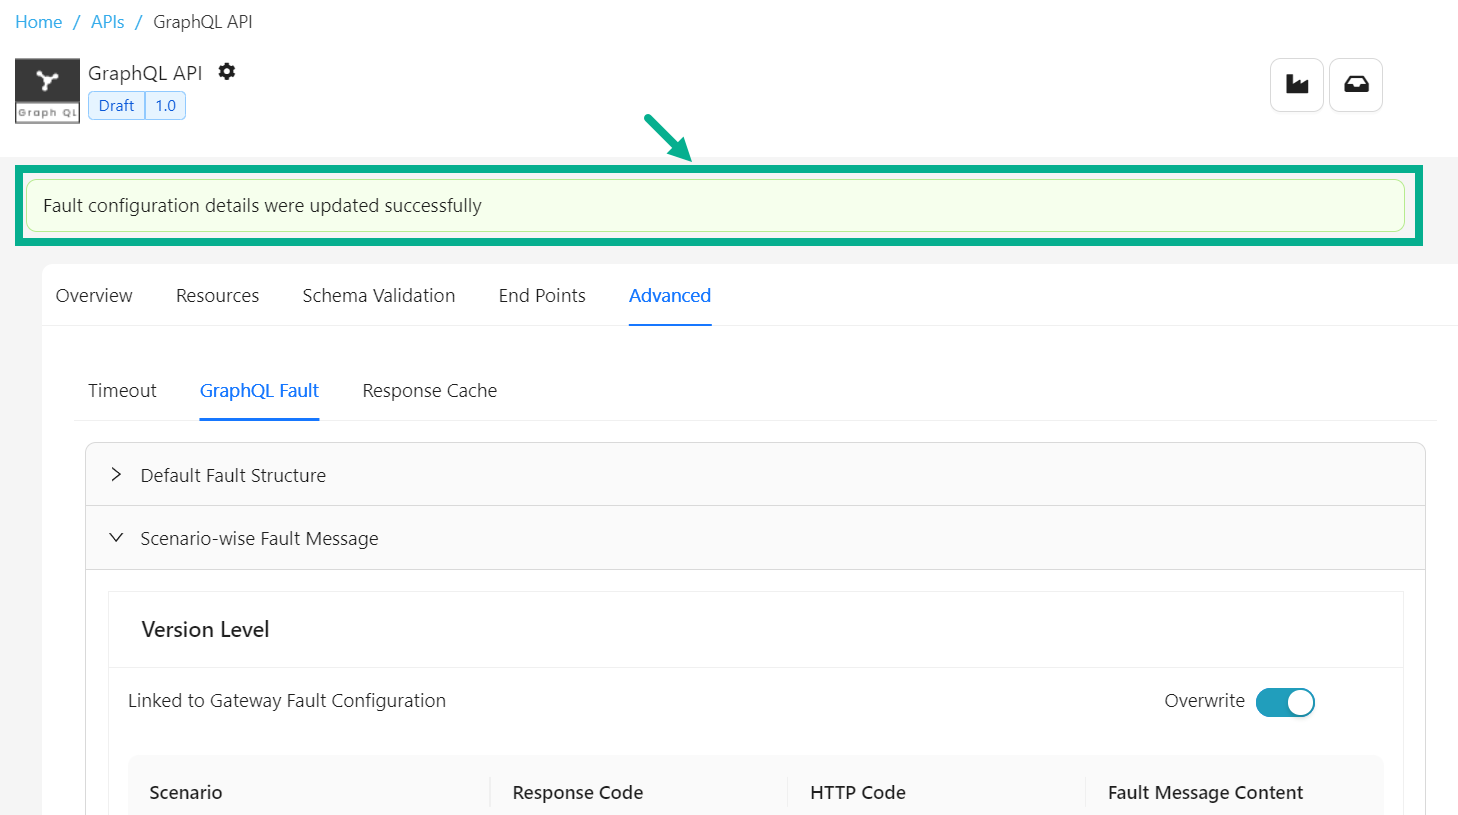
Set GraphQL Fault setup for the GraphQL API
- Navigate to the GraphQL API's Advanced tab.
The screen appears as shown below.
-
Select the GraphQL Fault tab.
-
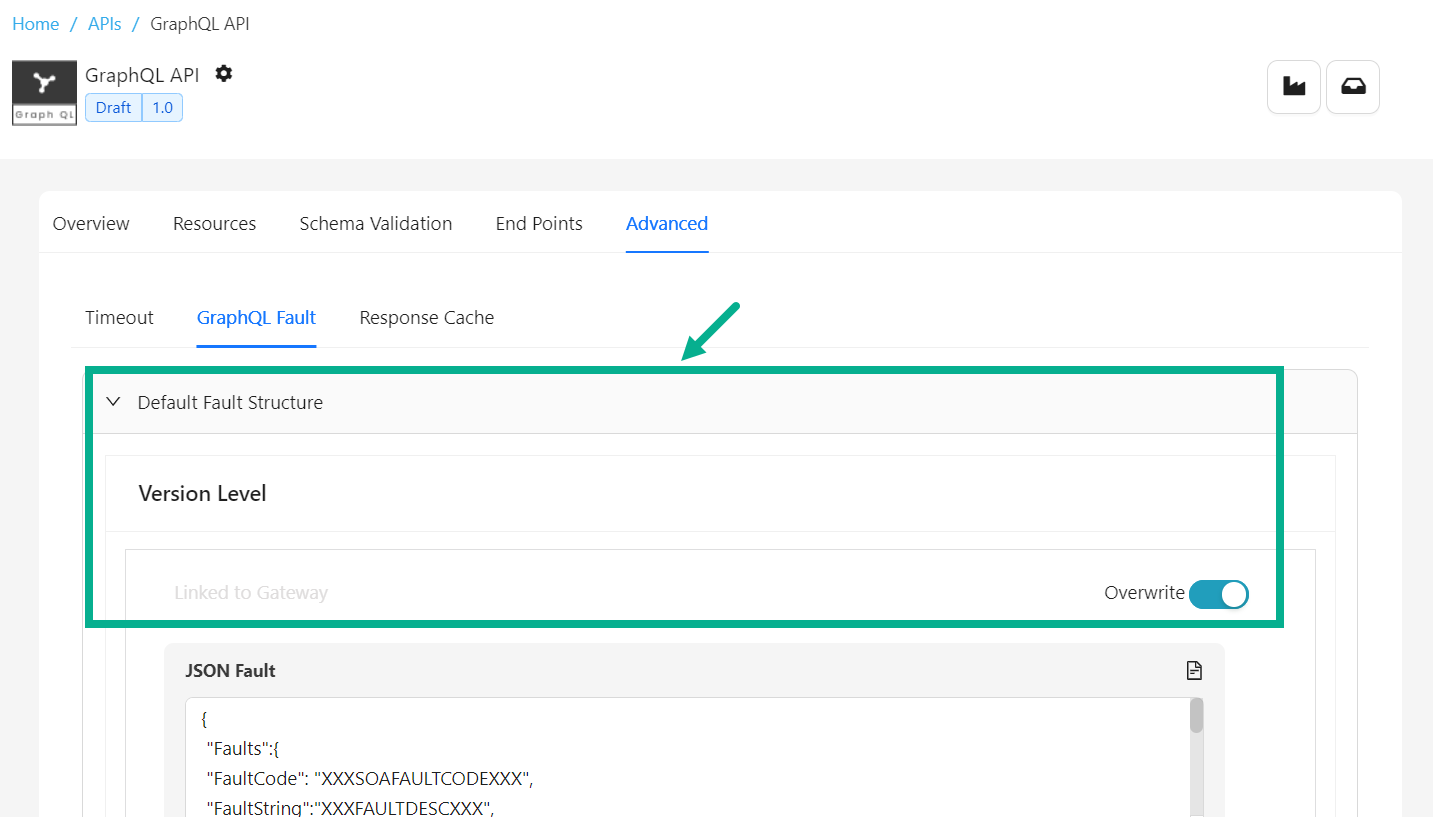
Click the Expand icon to expand the Default Content Type section.
-
Enable the Overwrite toggle to overwrite at the API Version Level.
-
Overwrite the JSON Fault at the API Version Level if necessary.
-
Enable the Overwrite toggle to overwrite at the respective Resource Level.

-
Overwrite the JSON Fault at the respective Resource Level.
-
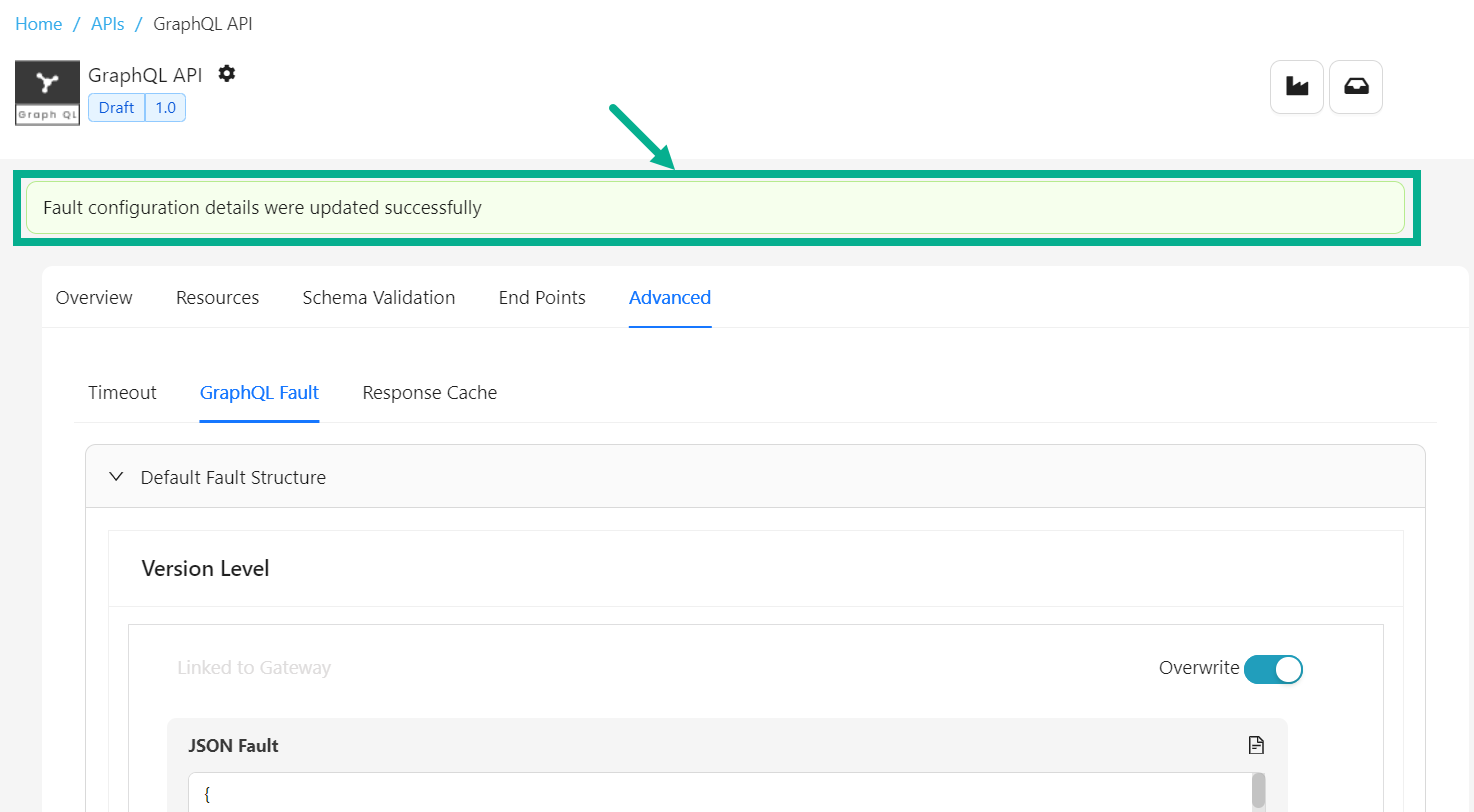
Click Save as Draft.
On saving, the confirmation message appears as shown below.
-
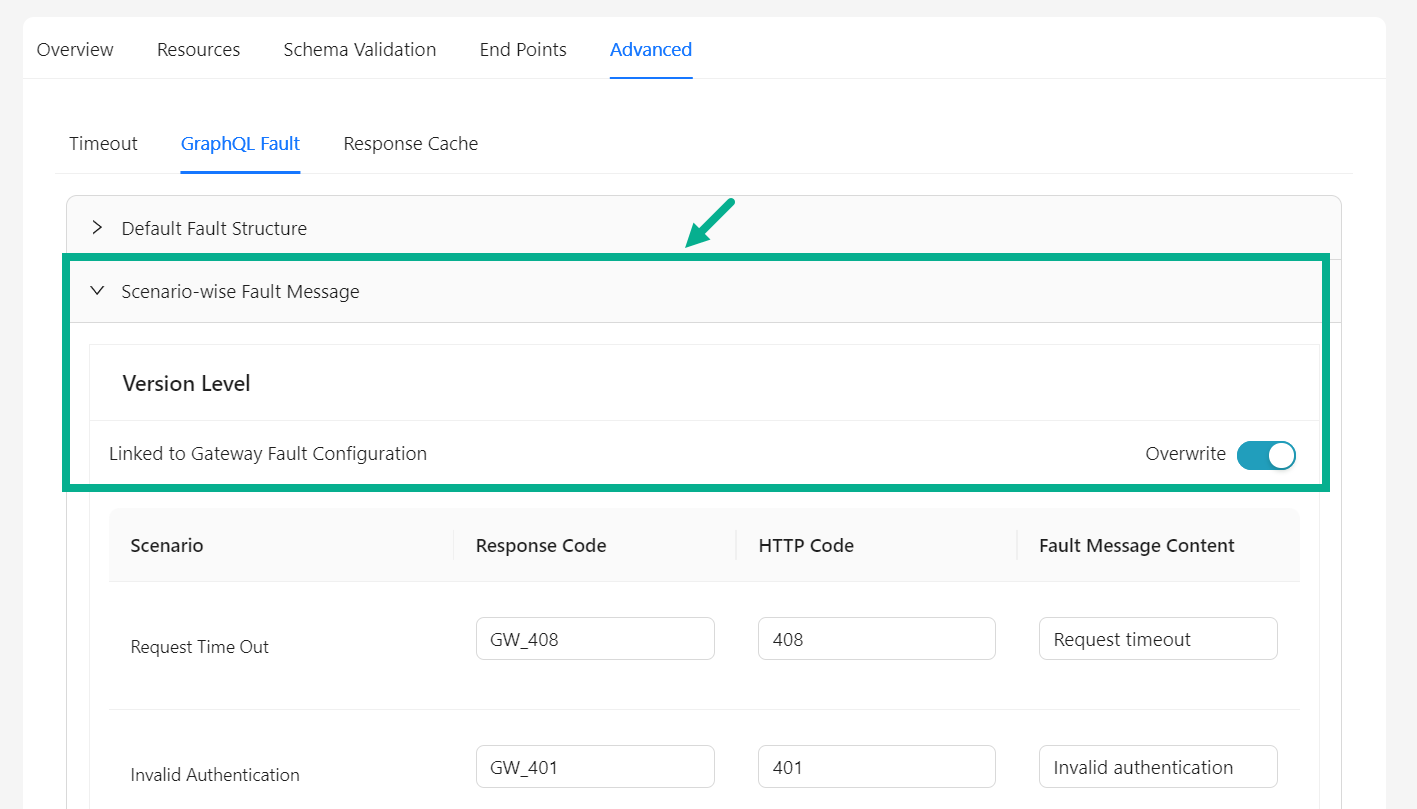
Click the Expand icon to expand the Scenario-wise Fault Message section.
-
Enable the Overwrite toggle to overwrite at the API Version Level.
-
Overwrite the Response Code, HTTP Code and Fault Message Content at the at the API Version Level if necessary.
-
Ensure that the Overwrite toggle is enabled to overwrite at the respective Resource Level.
-
Overwrite the Response Code, HTTP Code and Fault Message Content at the at the respective Resource Level if necessary.
-
Click Save as Draft.
On saving, the confirmation message appears as shown below.
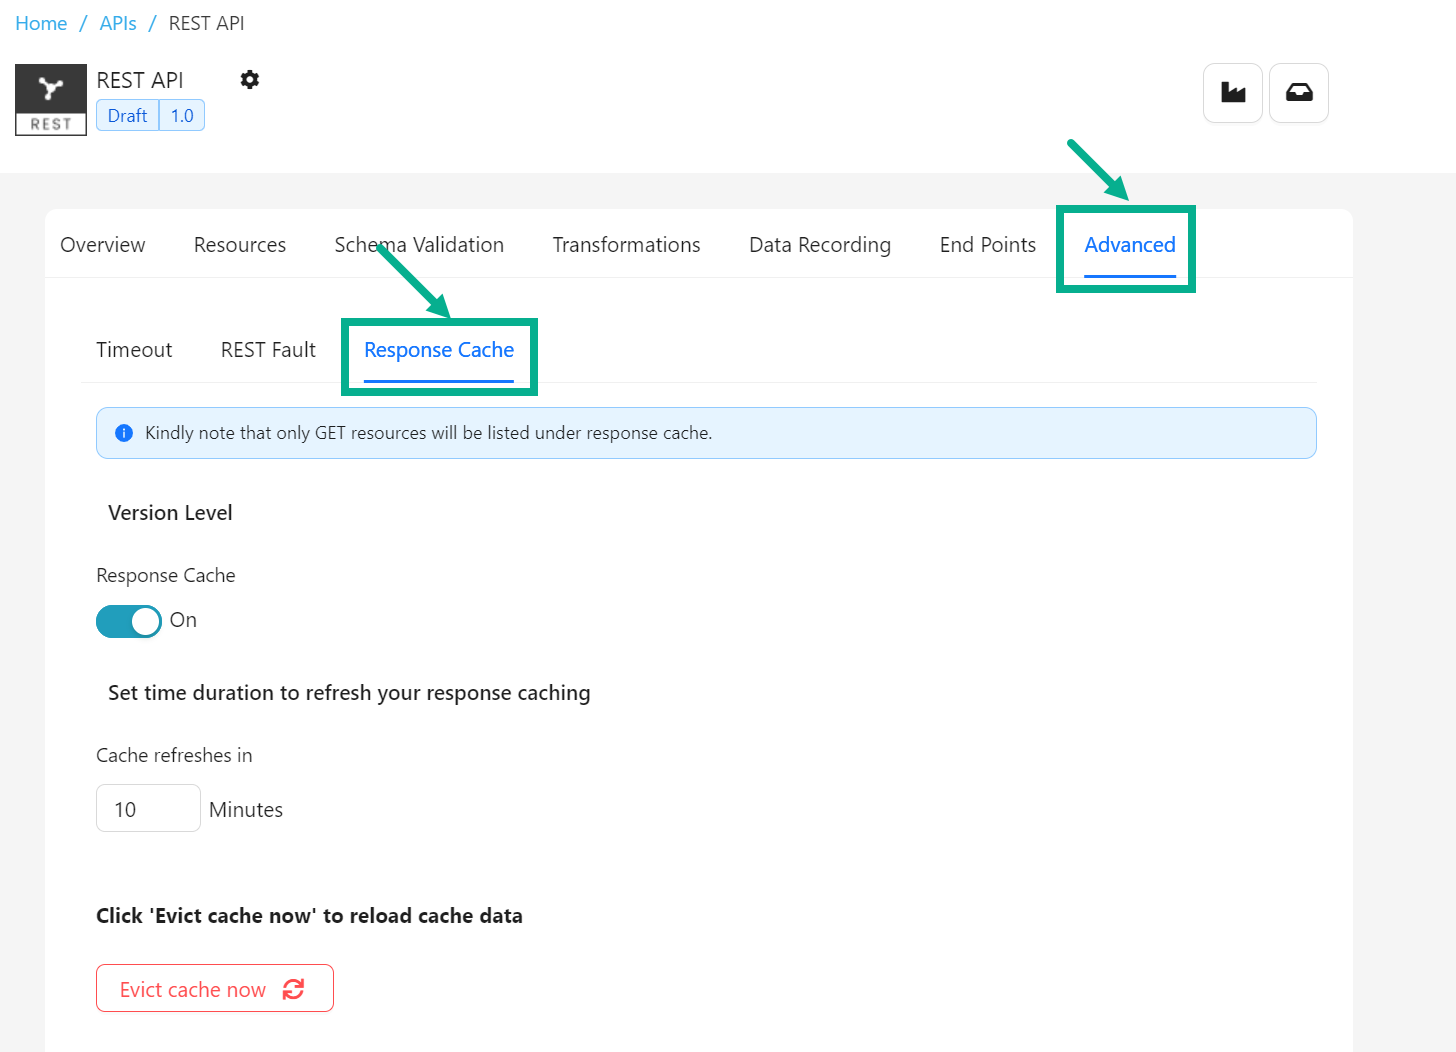
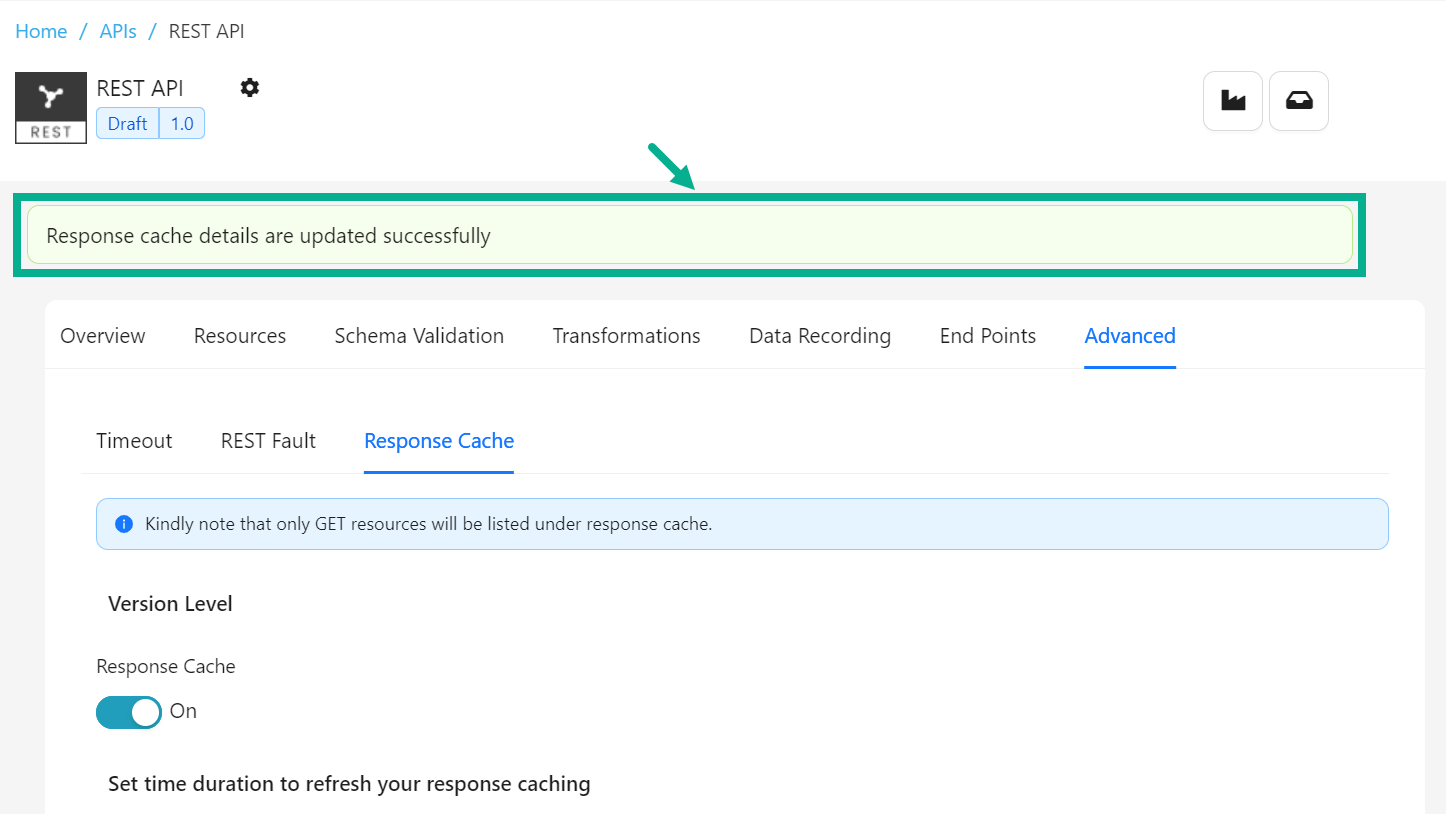
Set Response Cache for the REST API
For REST API, only GET resources will be displayed.
- Navigate to the REST API's Advanced tab.
The screen appears as shown below.
-
Select the Response Cache tab.
-
Enable Response Cache toggle to enable response cache at API version level.
-
Update Cache refreshes in as per the requirement.
-
Click Evict cache now button to reload the cache at version level.
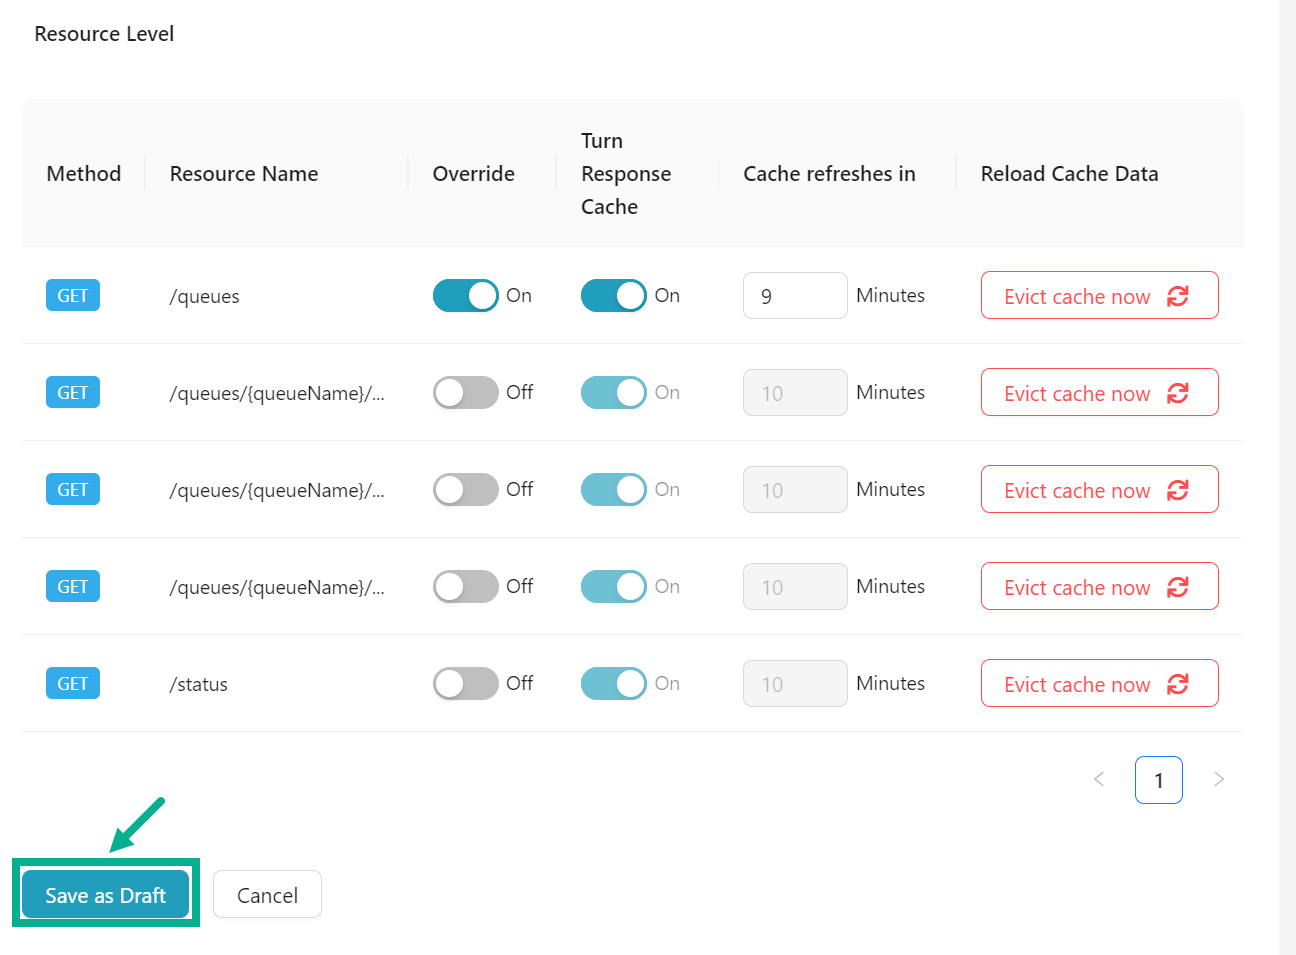
Any changes made to response cache settings at the version level will automatically apply to all resources. You can override the response cache settings at the resource level if necessary.
-
Enable the Override toggle to overwrite at the respective resource level.
-
Enable/disable the Turn Response Cache to enable/disable the response cache for the respective resource.
-
Update the Cache refreshes in at the respective resource level as per the requirement.
-
Click Evict cache now button to reload the cache at the respective resource Level.
-
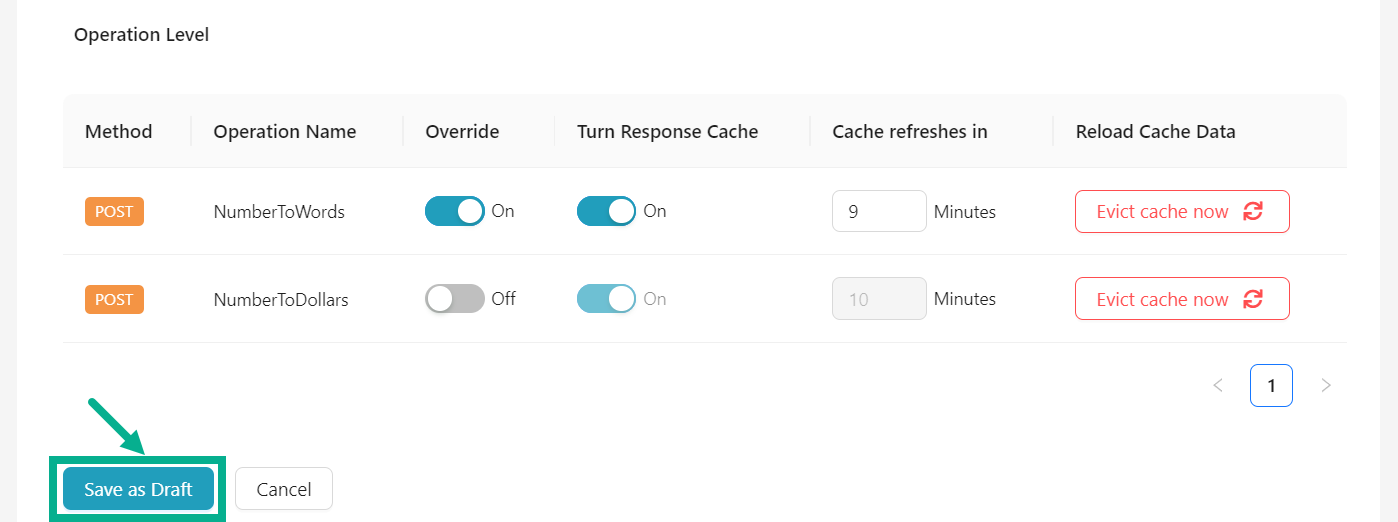
Click Save as Draft.
On saving, the confirmation message appears as shown below.
The response cache is updated whenever data is propagated or a new operation is added to the REST API.
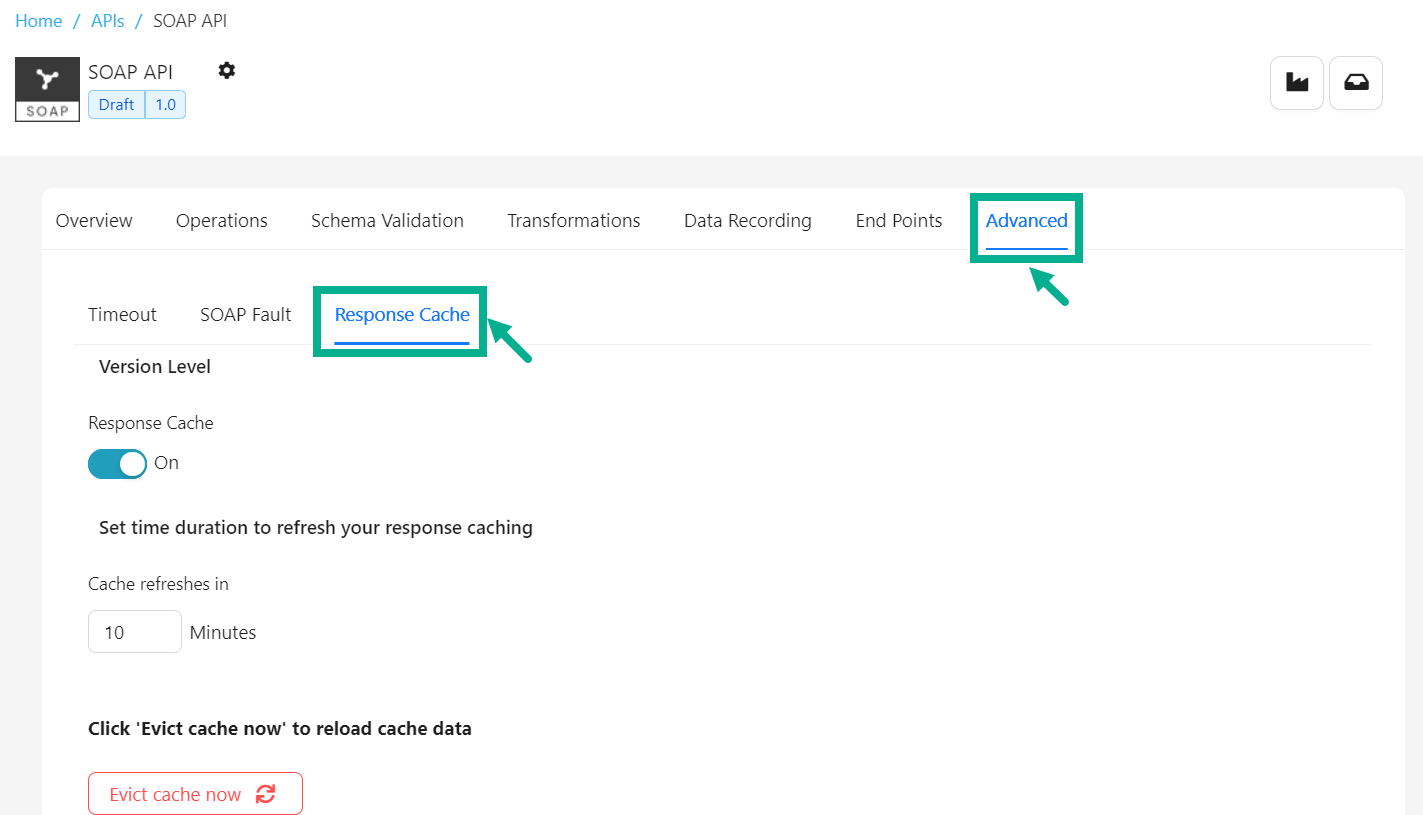
Set Response Cache for the SOAP API
- Navigate to the SOAP API's Advanced tab.
The screen appears as shown below.
-
Select the Response Cache tab.
-
Enable Response Cache toggle to enable response cache at API version level.
-
Update Cache refreshes in as per the requirement.
-
Click Evict cache now button to reload the cache at version level.
Any changes made to response cache settings at the version level will automatically apply to all operations. You can override the response cache settings at the operation level if necessary.
-
Enable the Override toggle to overwrite at the respective resource level.
-
Enable/disable the Turn Response Cache to enable/disable the response cache for the respective resource.
-
Update the Cache refreshes in at the respective resource level as per the requirement.
-
Click Evict cache now button to reload the cache at the respective resource Level.
-
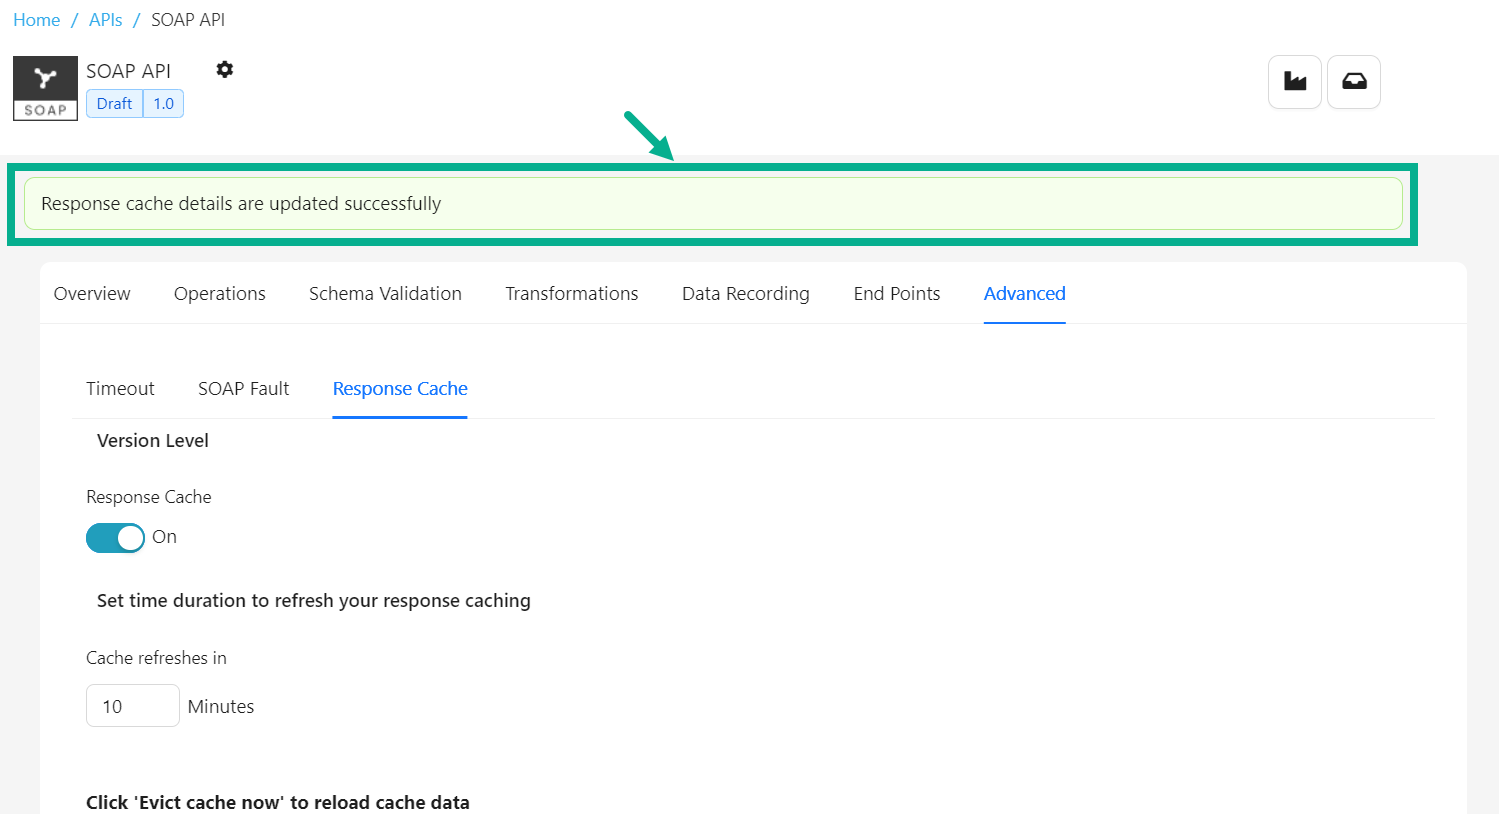
Click Save as Draft.
On saving, the confirmation message appears as shown below.
The response cache is updated whenever data is propagated or a new operation is added to the SOAP API.
Set Response Cache for the GraphQL API
- Navigate to the GraphQL API's Advanced tab.
The screen appears as shown below.
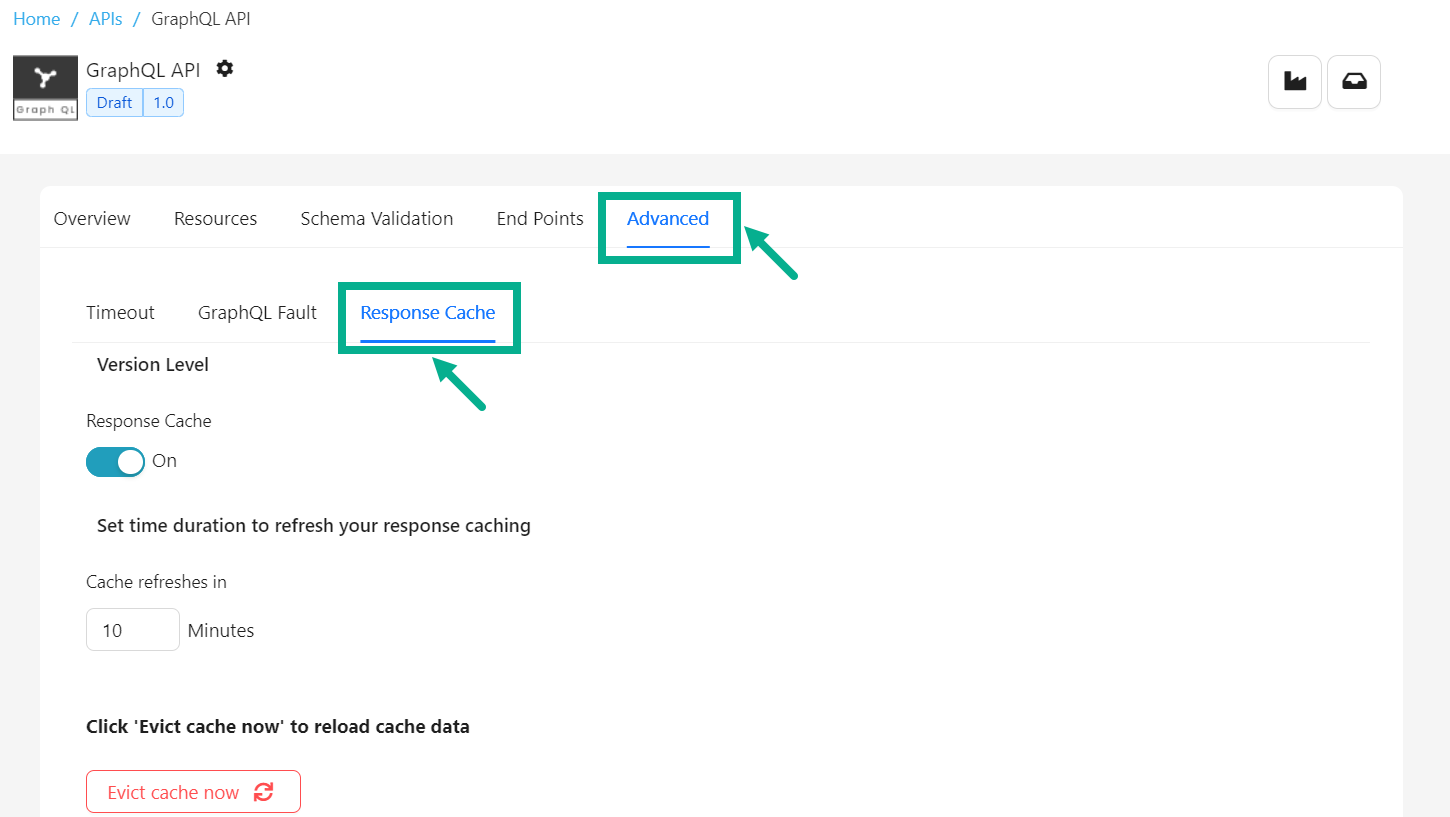
-
Select the Response Cache tab.
-
Enable Response Cache toggle to enable response cache at API version level.
-
Update Cache refreshes in as per the requirement.
-
Click Evict cache now button to reload the cache at version level.
Any changes made to response cache settings at the version level will automatically apply to all resources. You can override the response cache settings at the resource level if necessary.
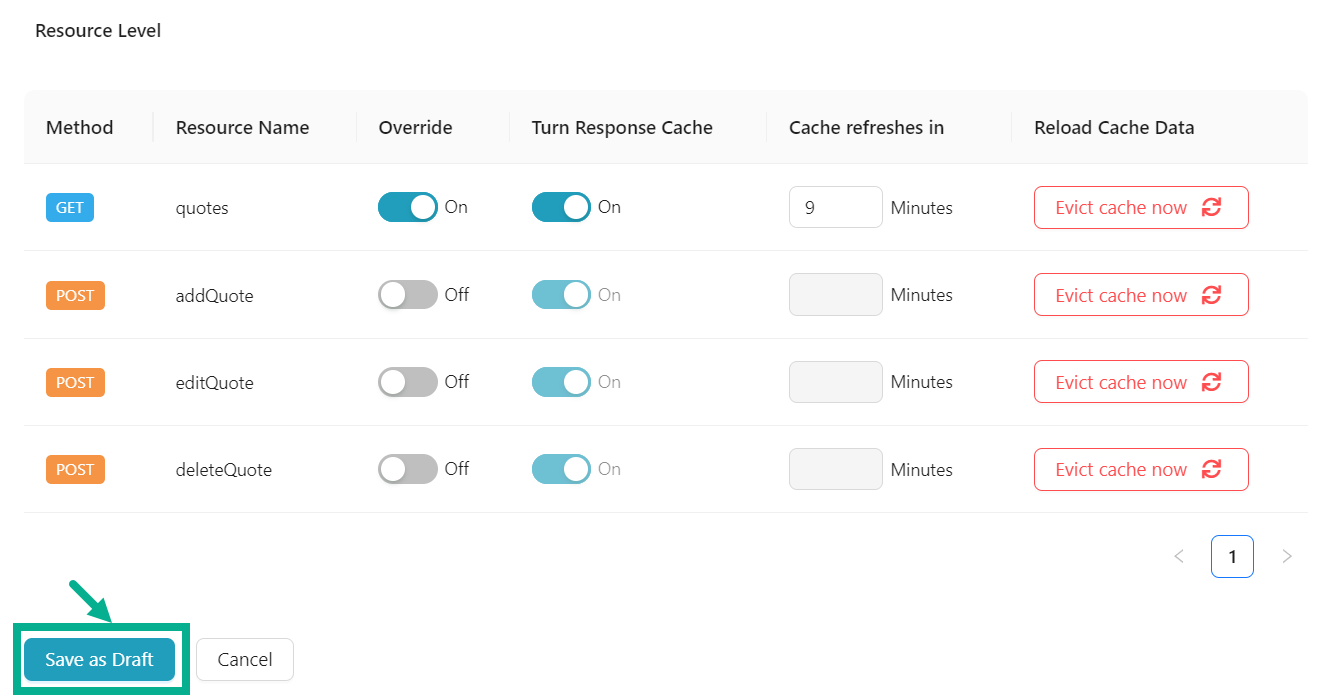
-
Enable the Override toggle to overwrite at the respective resource level.
-
Enable/disable the Turn Response Cache to enable/disable the response cache for the respective resource.
-
Update the Cache refreshes in at the respective resource level as per the requirement.
-
Click Evict cache now button to reload the cache at the respective resource Level.
-
Click Save as Draft.
On saving, the confirmation message appears as shown below.
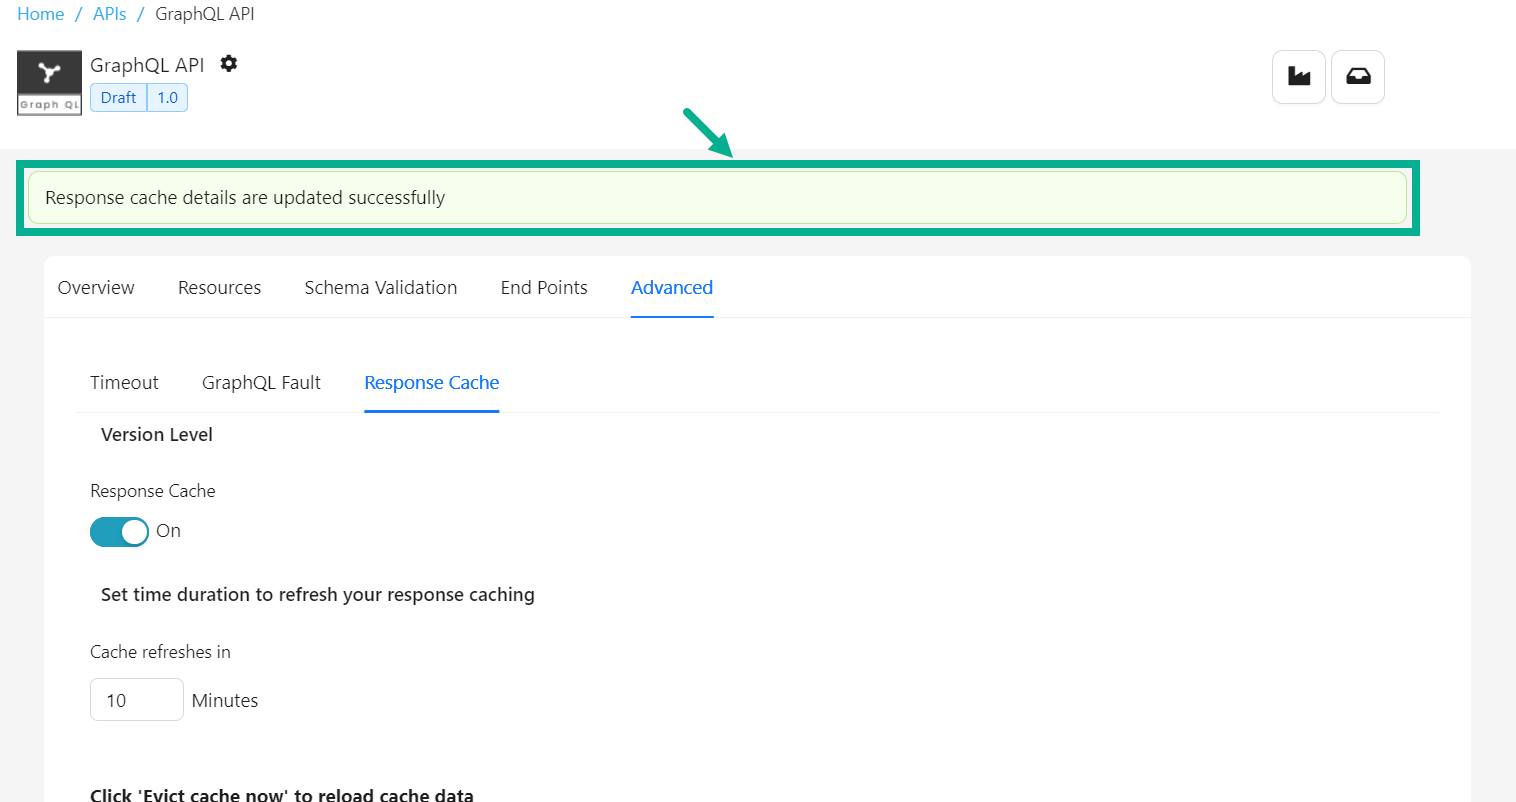
The response cache is updated whenever data is propagated or a new operation is added to the Graphql API.